CH 750 Cruzer · Носовая стойка · Страница 1 из 9
Носовая стойка: применимость
Раздел C75-LA-1 описывает носовое шасси Cruzer. Фотографии дополняют чертежи, имеющие преимущество при расхождениях. Допуски и общие приёмы работы — по Construction Standards for Zenair Light Aircraft.
Сверить с исходным текстом
CRUZER
Zenith Aircraft Company
Nose Gear
Section C75-LA-1, Page 1 of 9
Revision 1.0 (12/21/2015)
Section C75-LA-1
Nose Gear Installation
This manual has been prepared for assembly of the nose gear. This photo assembly manual is intended as
a supplement to the drawings. If there is any discrepancy between this manual and the drawings, the
drawings supersede this manual. For more information on building standards and allowable tolerances see
“Construction Standards for Zenair Light Aircraft” available from Zenith Aircraft Co.
CH 750 Cruzer · Носовая стойка · Страница 2 из 9
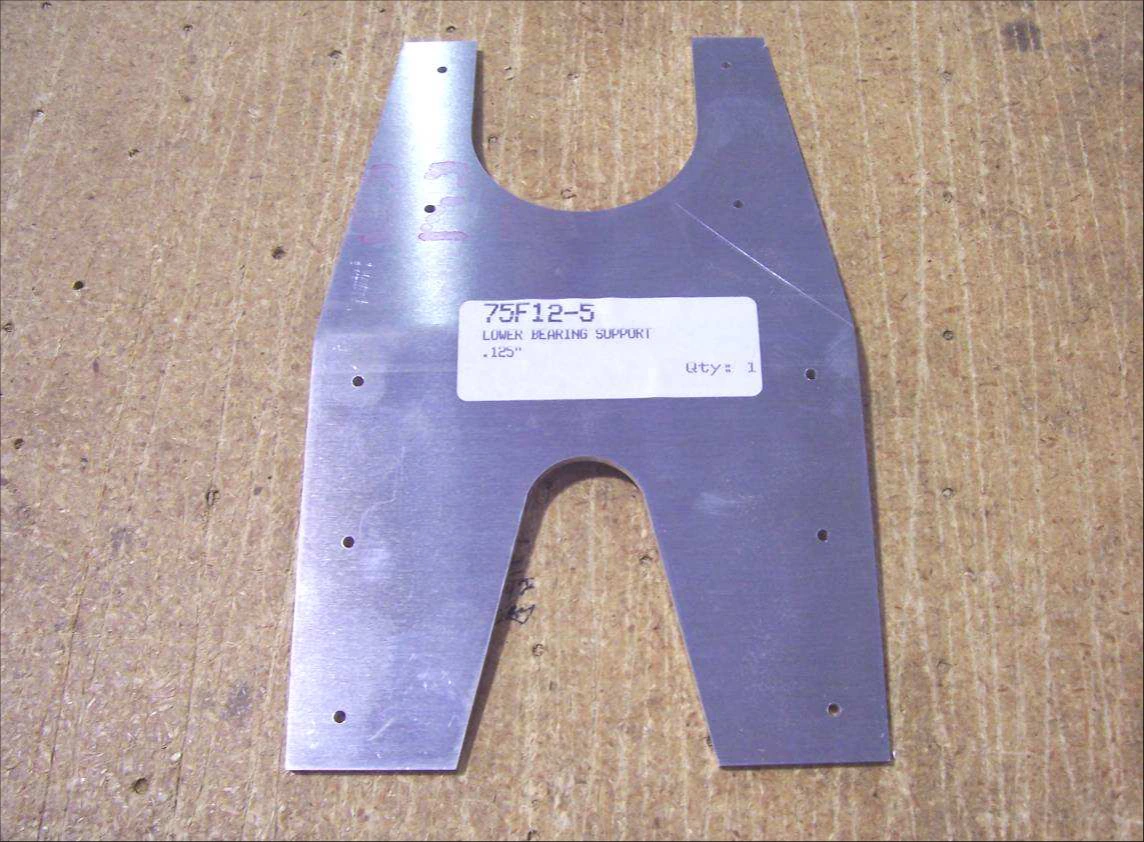
Нижняя опора подшипника
Соедините опору 75F12-5 с усилителем пола и полом кабины на Cleco. Рассверлите отверстия #12, удалите заусенцы и закрепите опору на фюзеляже восемью болтами AN3.
Сверить с исходным текстом
CRUZER
Zenith Aircraft Company
Nose Gear
Section C75-LA-1, Page 2 of 9
Revision 1.0 (12/21/2015)
P/N: 75F12-5
Lower Bearing
Support
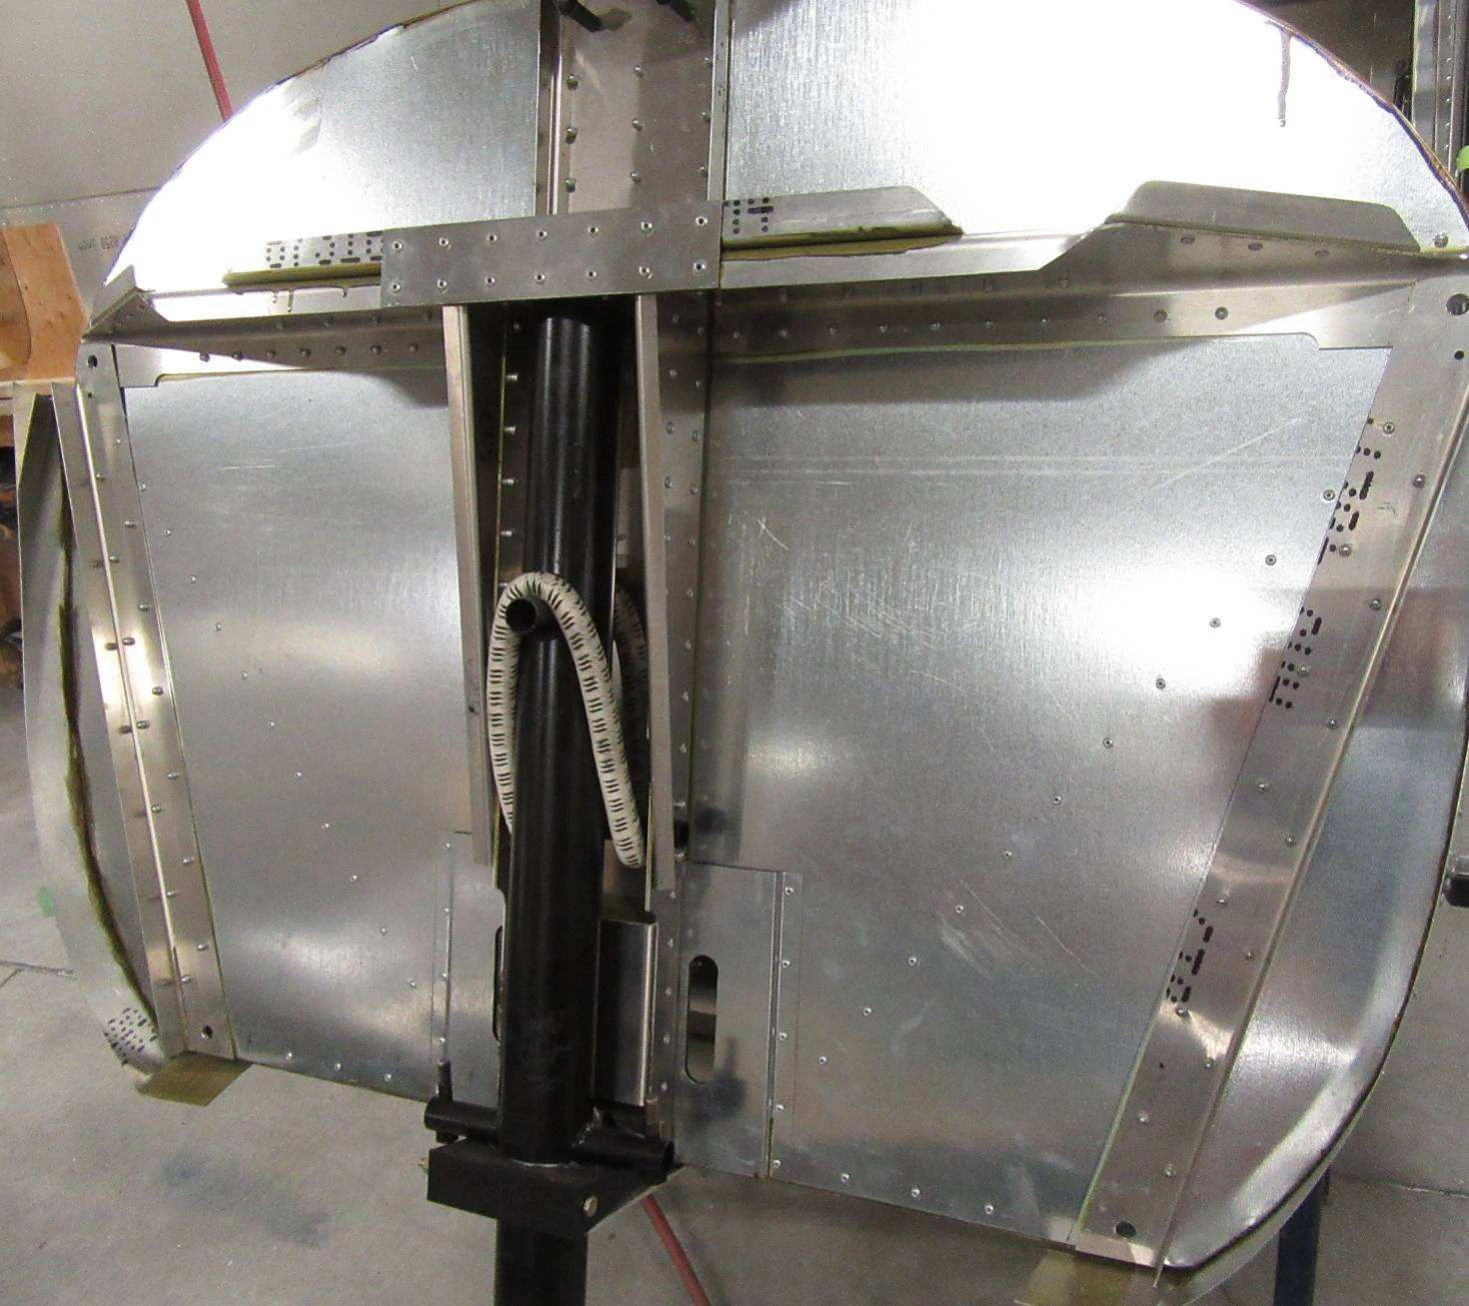
Cleco the Lower Bearing Support to the Floor Stiffener and Cabin Floor
With a #12 drill bit, expand the holes. Deburr and bolt the Lower Bearing Support to the Fuselage with 8
AN3 bolts.
CH 750 Cruzer · Носовая стойка · Страница 3 из 9
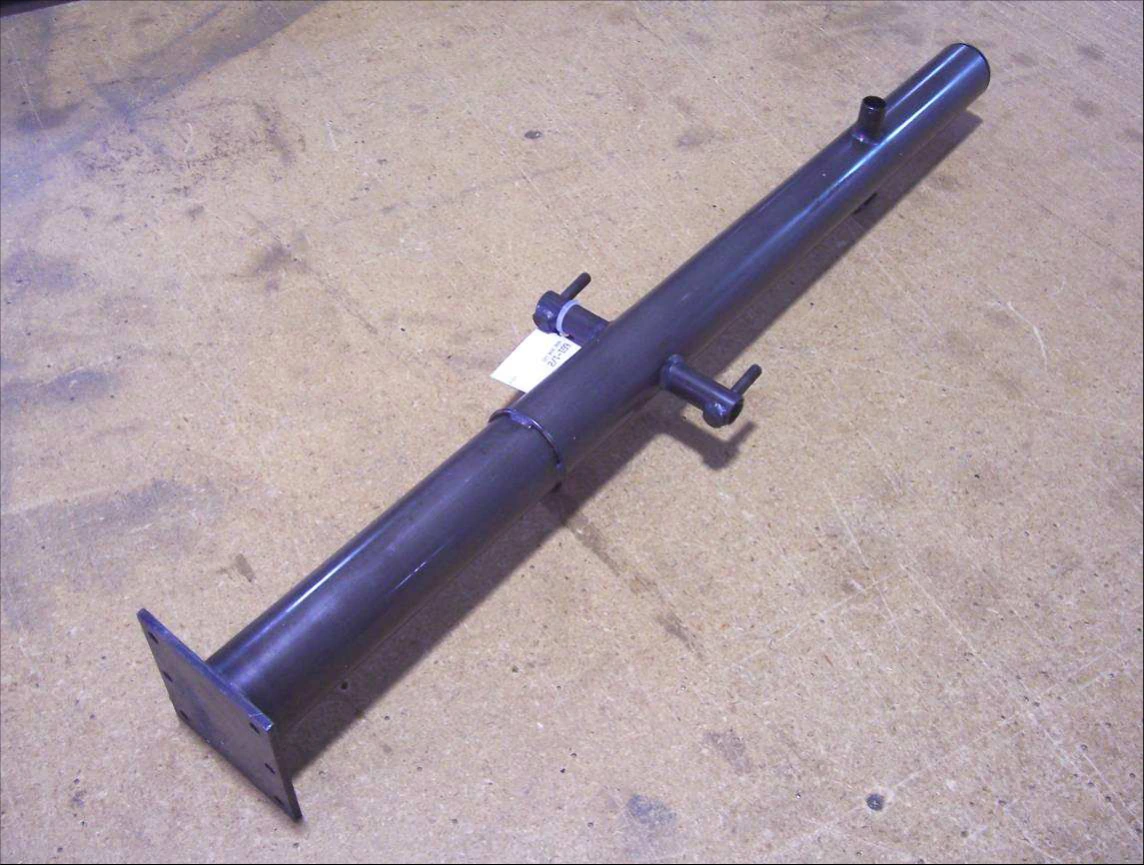
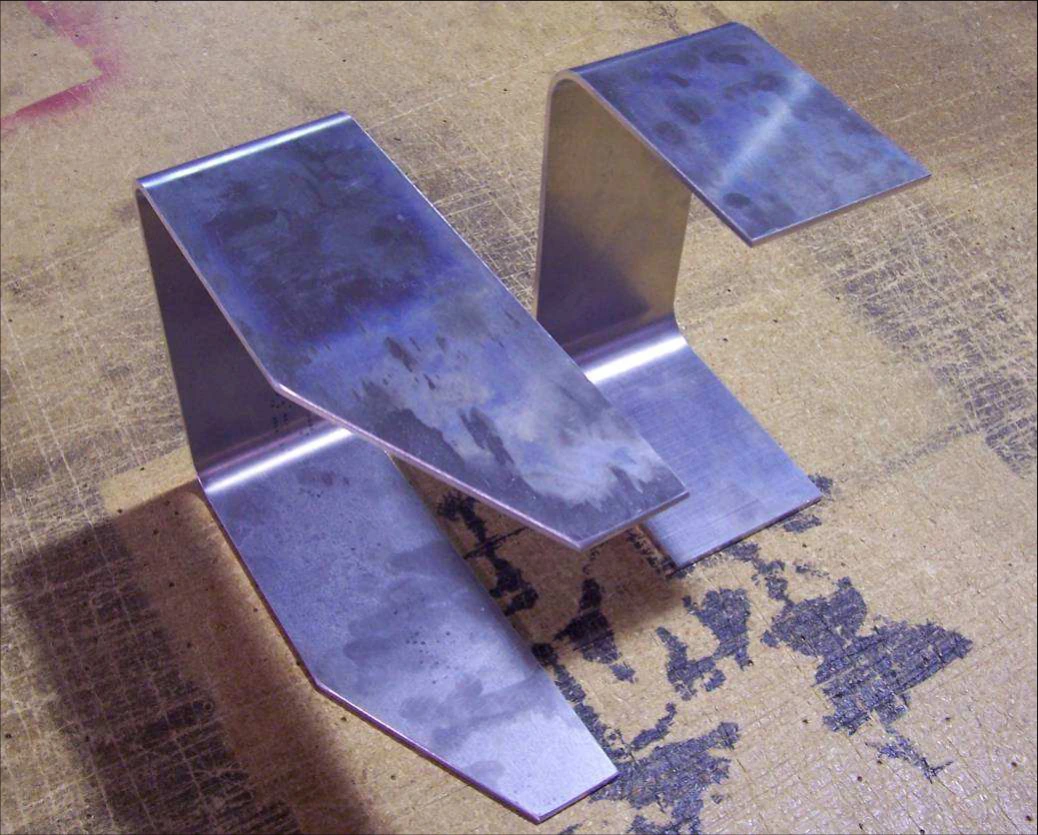
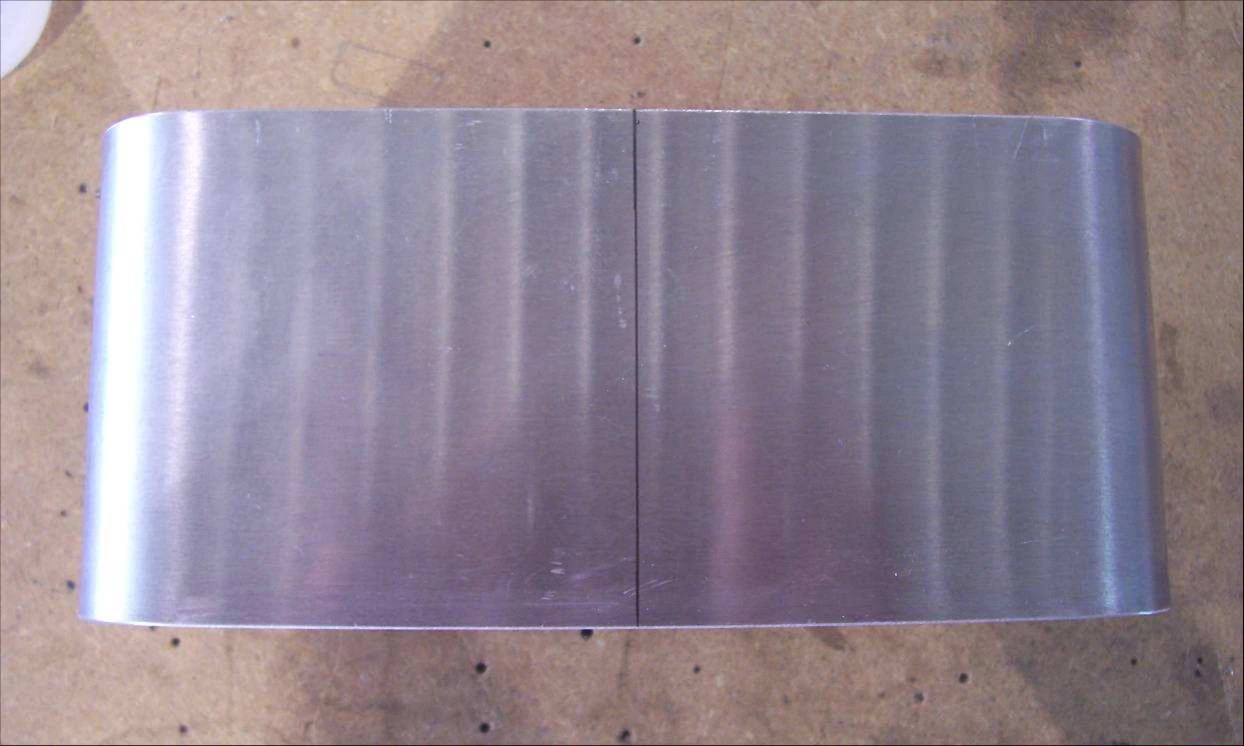
Детали носового шасси
На фотографиях показаны стойка C75L1-1, вилка носового колеса C75L1-2 и усиление вилки C75L1-3. Сверьте их ориентацию перед разметкой.
Сверить с исходным текстом
CRUZER
Zenith Aircraft Company
Nose Gear
Section C75-LA-1, Page 3 of 9
Revision 1.0 (12/21/2015)
P/N: C75L1-1
Nose Gear
Leg
P/N: C75L1-2
Nose Wheel
Fork
P/N: C75L1-3
Nose Wheel
Fork Doubler
CH 750 Cruzer · Носовая стойка · Страница 4 из 9
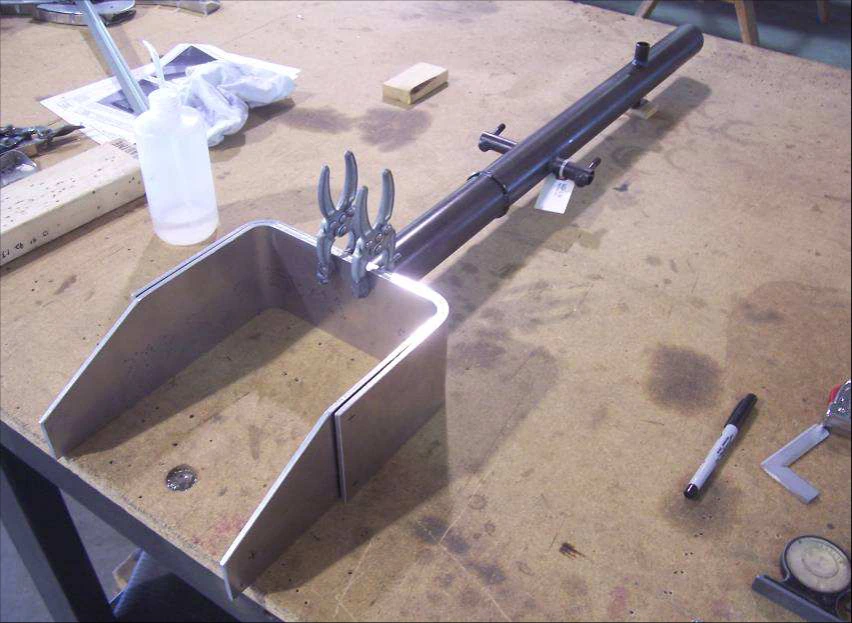
Усиление вилки
Нанесите осевую линию сверху усиления и зажмите его на вилке. Слева и справа разметьте отверстия в 12mm от передней и задней кромок и на 12mm выше низа усиления. Просверлите #40 с Cleco, затем рассверлите до 1/4". Удалите заусенцы и соедините усиление с вилкой болтами AN4.
Сверить с исходным текстом
CRUZER
Zenith Aircraft Company
Nose Gear
Section C75-LA-1, Page 4 of 9
Revision 1.0 (12/21/2015)
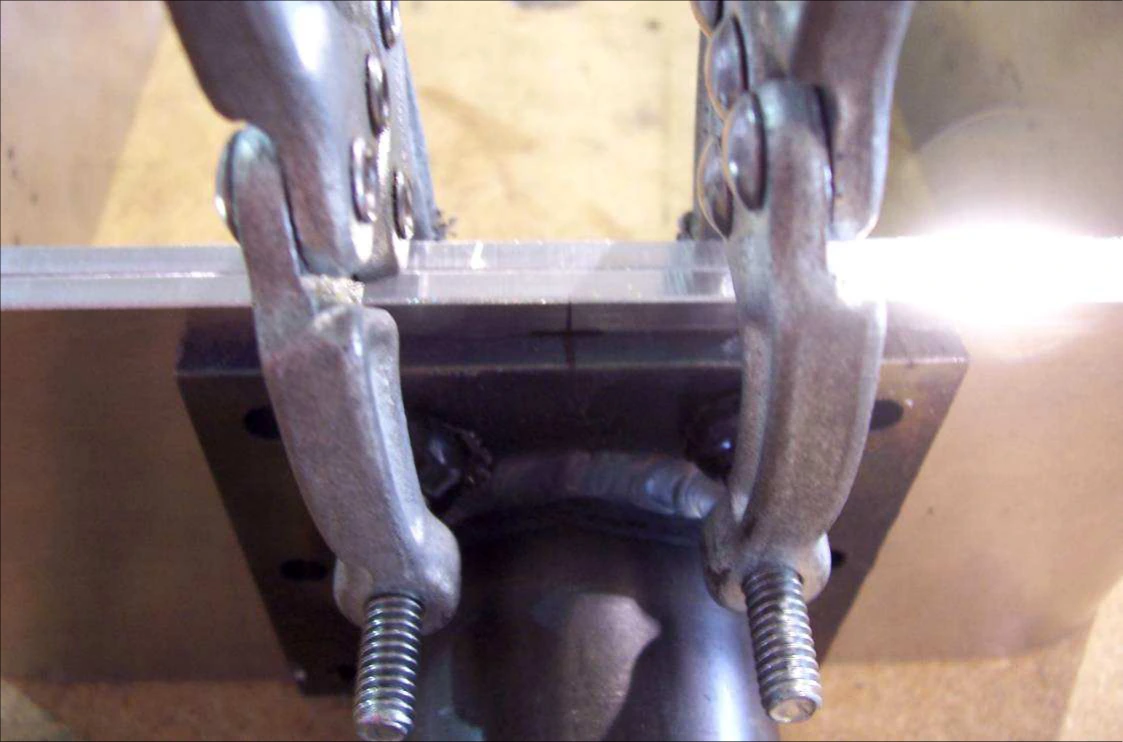
Mark the center line on the top of the Doubler.
Clamp the Doubler on the Fork. Mark bolt locations 12mm from the front and back edges
and up 12mm from the bottom of the Doubler on the left and right side. With a #40 drill bit,
drill and Cleco the Doubler to the Fork. Expand the holes to 1/4". Deburr the holes and bolt
the Doubler to the Fork with AN4 bolts.
CH 750 Cruzer · Носовая стойка · Страница 5 из 9
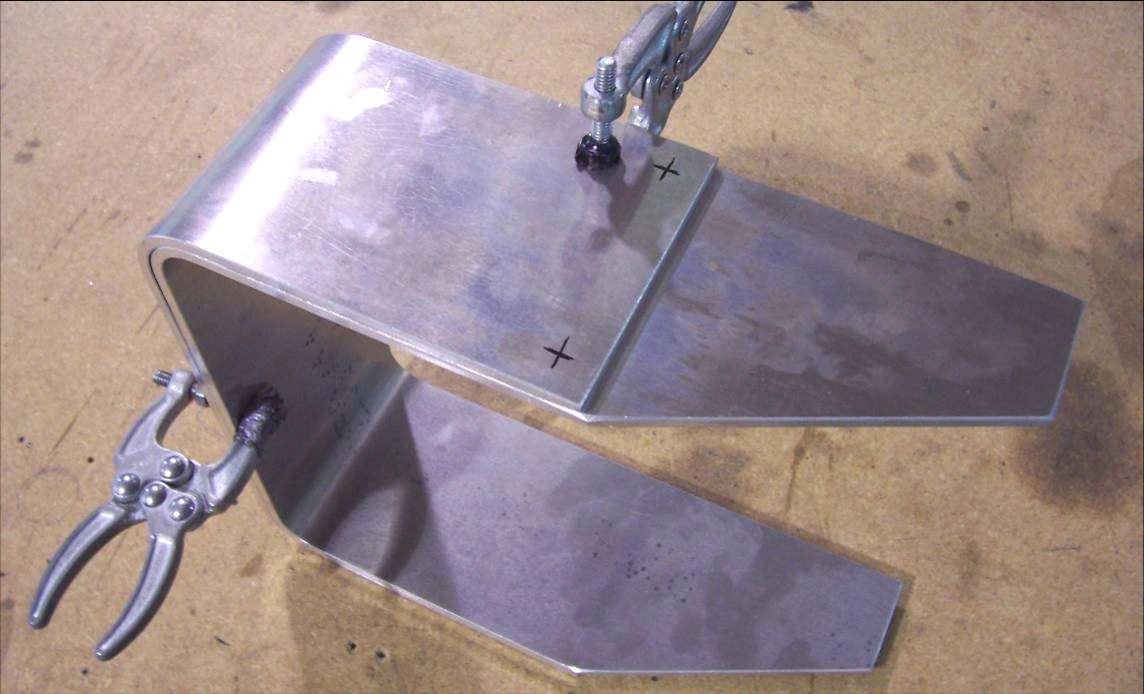
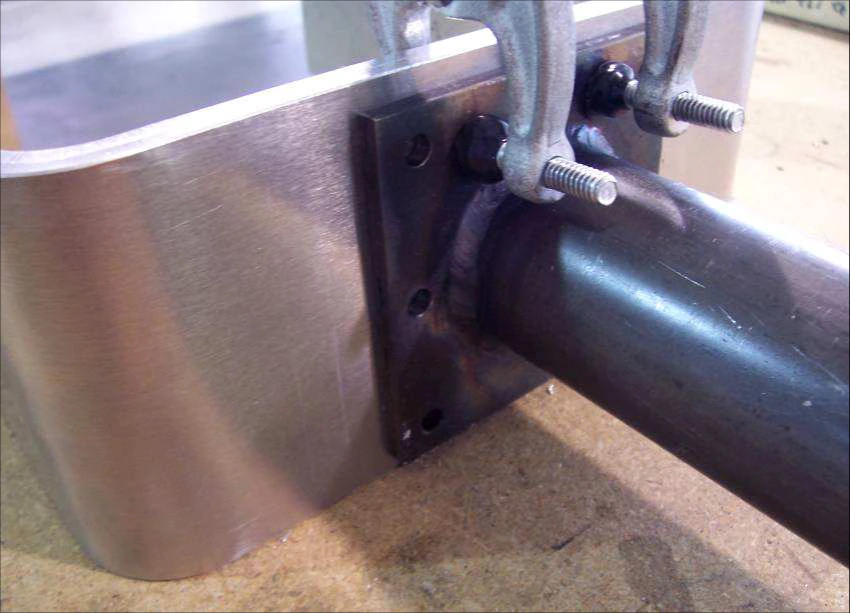
Ориентация стойки на вилке
Перед стойки должен быть зажат у переда вилки: скошенная сторона вилки направлена вперёд, пластина удержания амортизирующего жгута расположена сзади стойки.
Нанесите осевую линию на нижнюю пластину стойки, совместите с осью усиления. Край пластины установите на линии в 5mm от края усиления и зажмите.
Сверить с исходным текстом
CRUZER
Zenith Aircraft Company
Nose Gear
Section C75-LA-1, Page 5 of 9
Revision 1.0 (12/21/2015)
Be sure the front of the Nose Gear Leg is clamped to the front of the Fork. The tapered side
is forward on the Fork and the plate to retain the bungee is on the back of the Nose Gear
Leg.
Mark the center line on the bottom plate of the Nose Gear Leg. Align the center line on the
Doubler with the center line on the Nose Gear Leg. Position the edge of the Nose Gear Leg
plate on the line 5mm from the edge of the Doubler and Clamp the Nose Gear Leg in place.
CH 750 Cruzer · Носовая стойка · Страница 6 из 9
Крепление стойки и амортизирующий жгут
Разметьте по три болта с каждой стороны пластины стойки. Начните #40 и ступенчато рассверлите до 1/4”. Удалите заусенцы и соедините стойку с вилкой и усилением болтами.
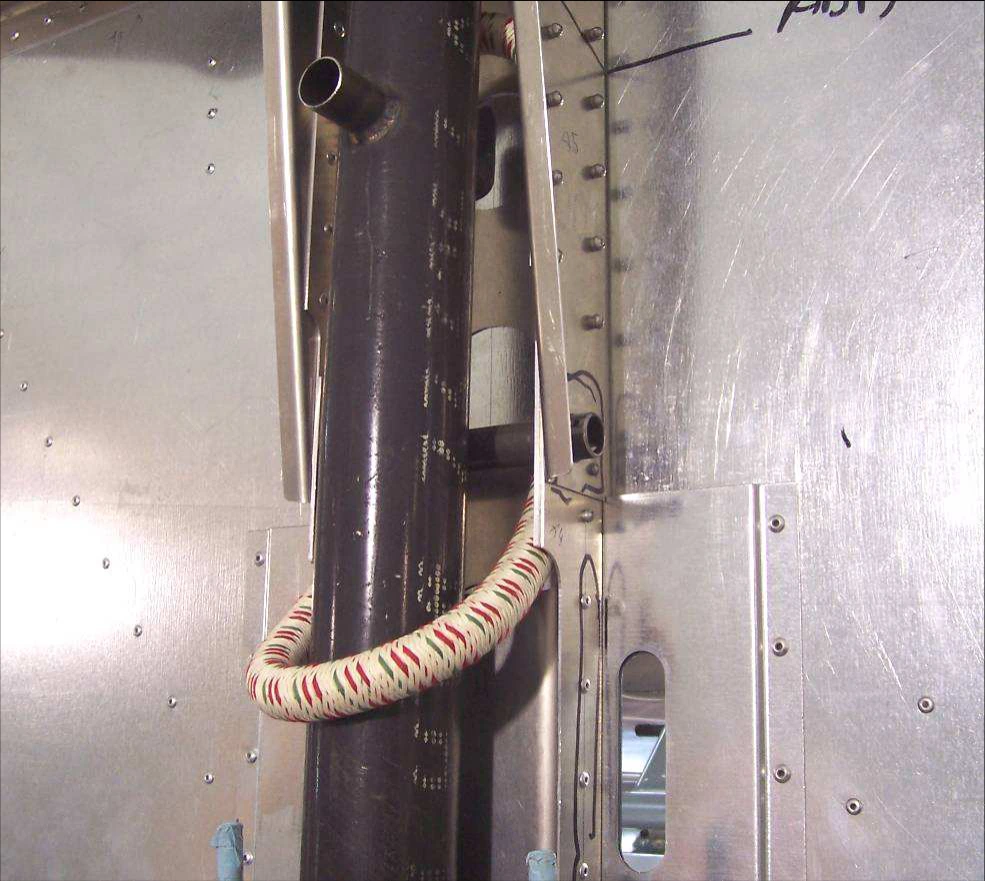
Установите жгут 1080HD вокруг стойки и верните стойку на перегородку. Перед окончательной установкой смажьте подшипники. Установите палец C75L1-6 и закрепите на перегородке шплинтом с каждой стороны. Жгут должен проходить под пальцем.
Сверить с исходным текстом
CRUZER
Zenith Aircraft Company
Nose Gear
Section C75-LA-1, Page 6 of 9
Revision 1.0 (12/21/2015)
Layout 3 bolts locations on each side of the Nose Gear Leg plate and drill the holes to 1/4”.
Start with a #40 drill and work up to 1/4”. Deburr the holes and bolt the Nose Gear Leg to
the Fork and Doubler.
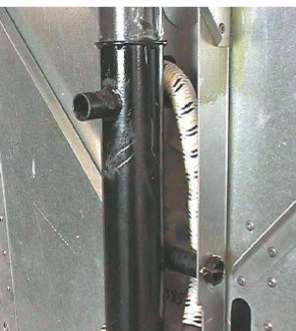
Position the Shock Bungee around the Nose Gear and reinstall the Nose Gear on the
Firewall. Be sure to grease the Bearings before final installation. Install the Bungee Pin and
secure it to the Firewall with a Cotter Pin on each side. Make sure the Bungee is under the
Pin.
P/N: C75L1-6
Bungee Pin
P/N: 1080HD
Shock
Bungee
CH 750 Cruzer · Носовая стойка · Страница 7 из 9
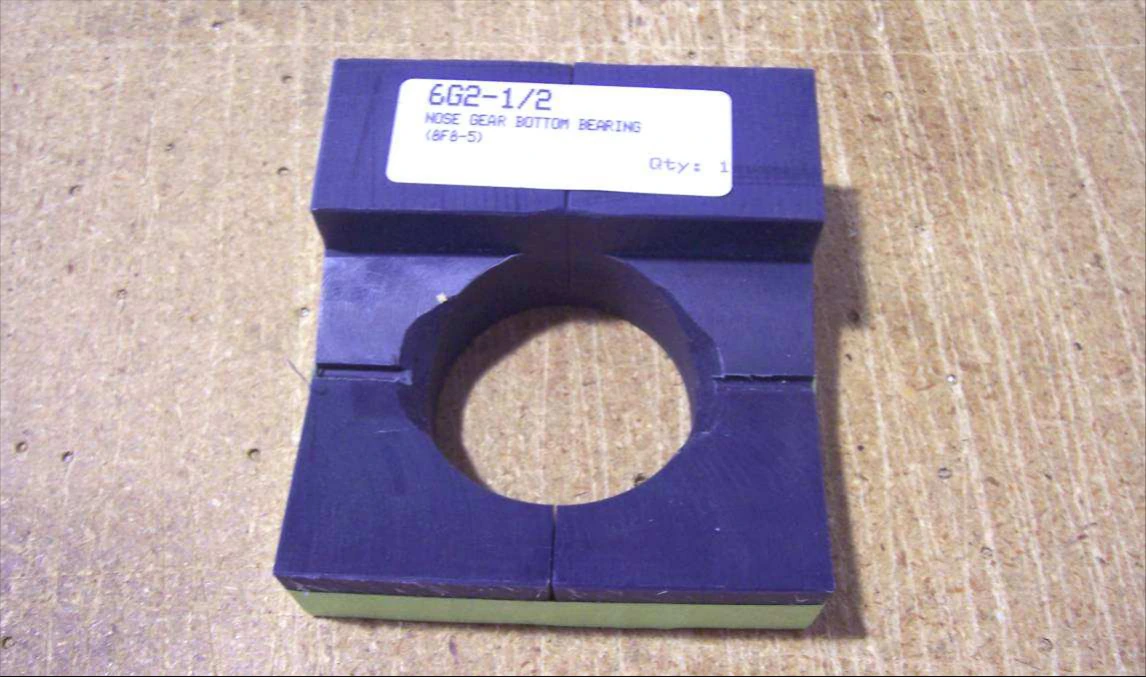
Нижний подшипник
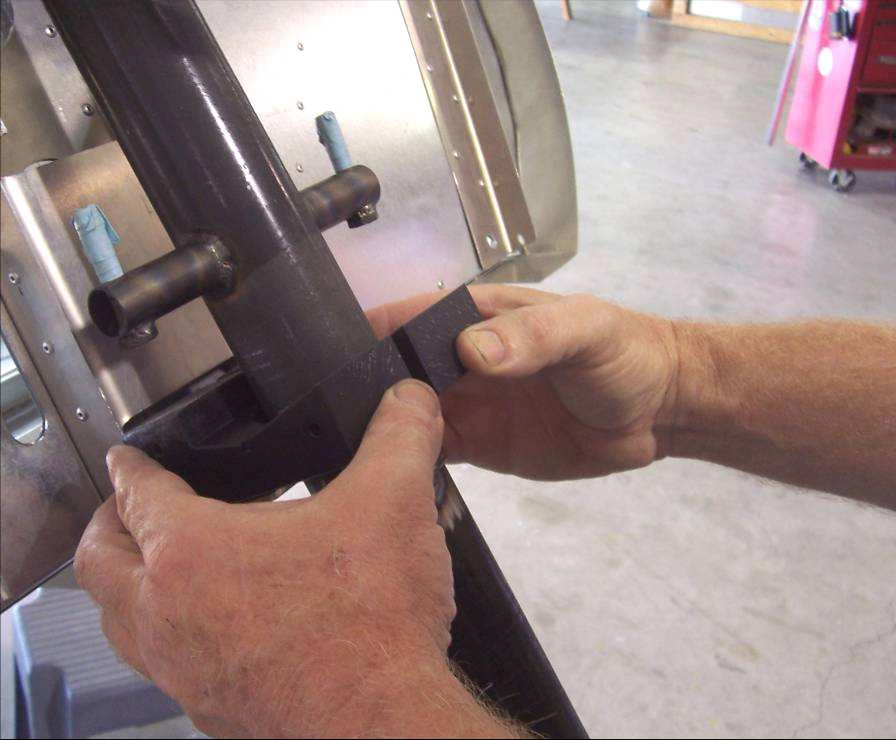
Установите нижний подшипник C75L1-7 вокруг стойки. Поднимите стойку в верхний подшипник; нижний введите между полками центрального усилителя перегородки.
Важно: палец жгута должен быть установлен до нижнего подшипника. Сверлите подшипник через нижнюю опору #30 с Cleco, затем ступенчато рассверлите до #3.
Сверить с исходным текстом
CRUZER
Zenith Aircraft Company
Nose Gear
Section C75-LA-1, Page 7 of 9
Revision 1.0 (12/21/2015)
P/N: C75L1-7
Nose Gear
Bottom
Bearing
Position the Bottom Bearing around the Nose Gear Leg. Slide the Nose Gear Leg up into the Upper Bearing
and push the Bottom Bearing between the flanges of the Center Firewall Stiffener
. Back drill through the Lower Bearing Support into the Bottom Bearing with a #30 drill bit and Cleco. Expand
the holes in steps up to a #3 drill bit.
Check that the Bungee Pin is installed
before installing the bottom bearing.
CH 750 Cruzer · Носовая стойка · Страница 8 из 9
Резьба и кондуктор
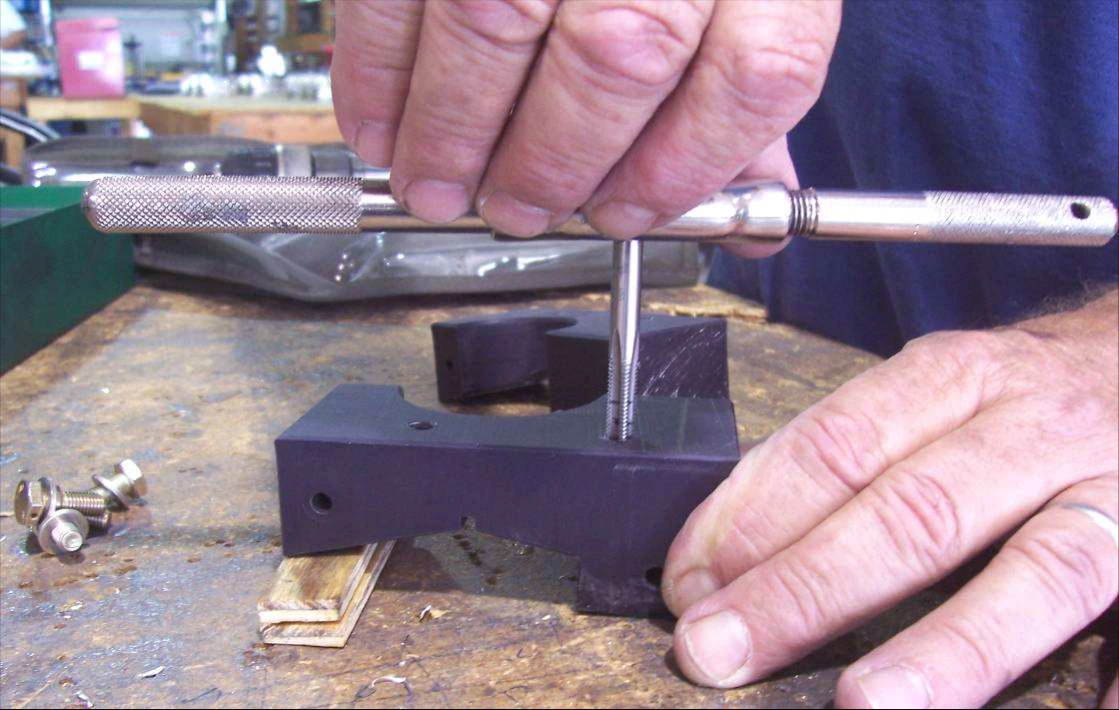
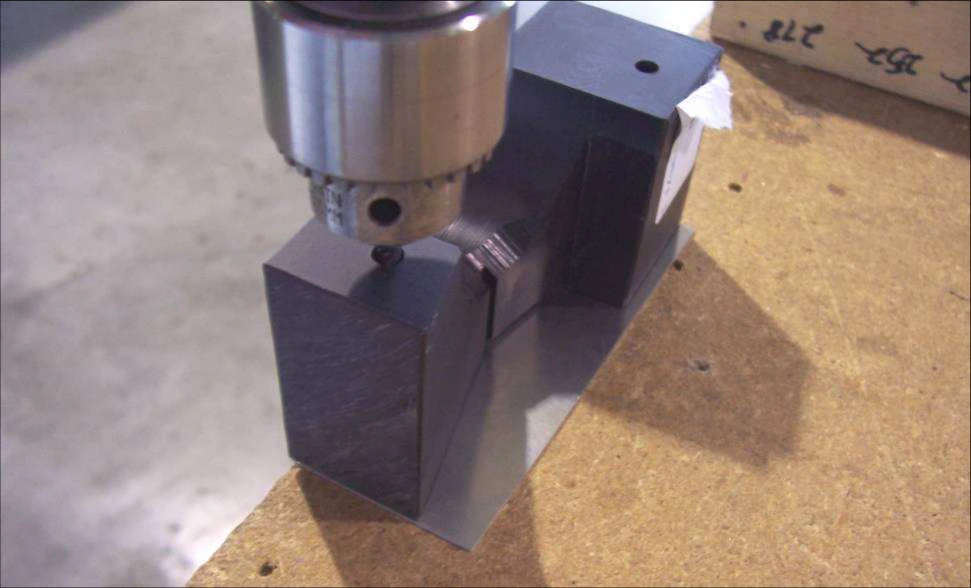
Снимите нижний подшипник и стойку. Переверните подшипник, поддержите переднюю часть фанерой. В только что просверленных отверстиях нарежьте резьбу метчиком ¼”-28 под AN4H-5A. Метчик должен быть перпендикулярен нижней поверхности подшипника.
Из обрезка изготовьте кондуктор для нижнего подшипника, совместив его с нижней и задней поверхностями. Сверлите оба отверстия кондуктора по подшипнику #12.
Сверить с исходным текстом
CRUZER
Zenith Aircraft Company
Nose Gear
Section C75-LA-1, Page 8 of 9
Revision 1.0 (12/21/2015)
Remove the Bottom Bearing and Nose Gear Leg from the Firewall. Flip the Bottom Bearing over and use a
couple pieces of plywood to support the front of the Bottom Bearing. Use a ¼”-28 tap, to tap the holes just
drilled for AN4H-5A bolts. Be careful when tapping the threads; be sure the tap is perpendicular to the bottom
of the Bearing.
Make a drill guide for the Lower Bearing from a piece of scrap material. Be sure the scrap material is flush at
the bottom and rear of the Bearing. With a #12 drill bit, back drill through the Bearing into the scrap, be sure
to drill both holes.
CH 750 Cruzer · Носовая стойка · Страница 9 из 9
Крепление и контровка подшипника
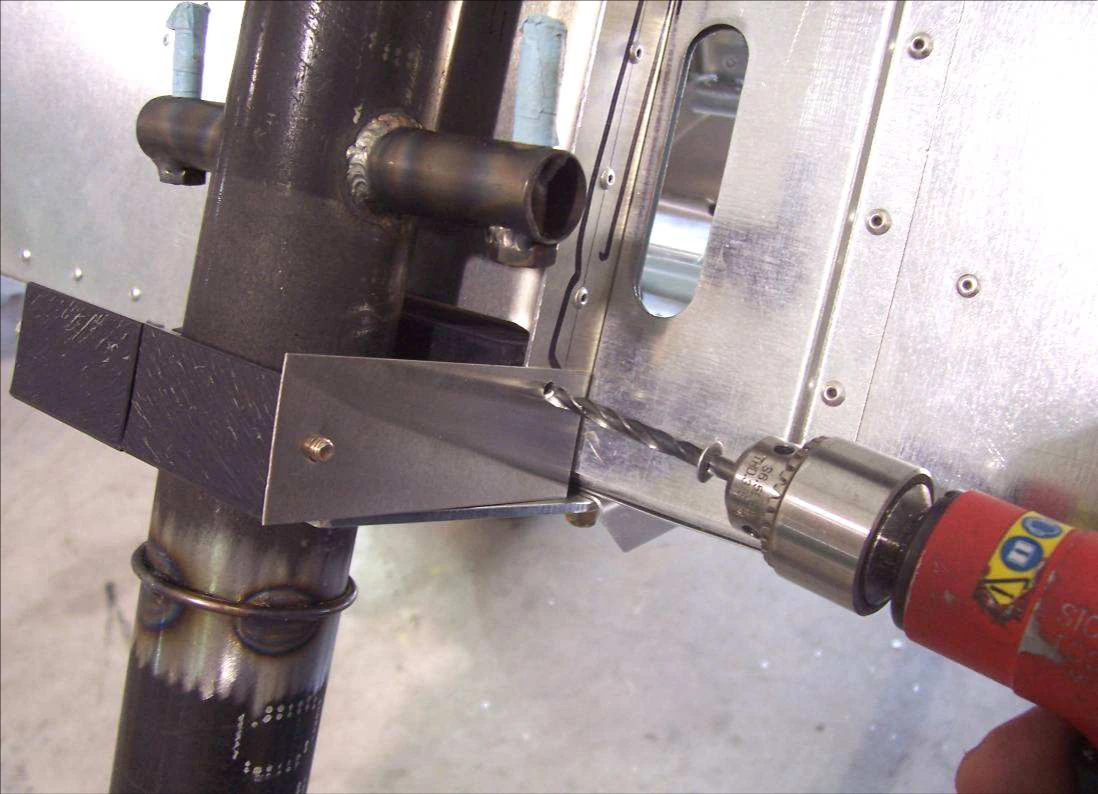
Передним болтом AN3 закрепите кондуктор. Установите его низ на нижнюю опору с перекрытием наружной стороны центрального усилителя перегородки. Сверлите усилитель через кондуктор #12.
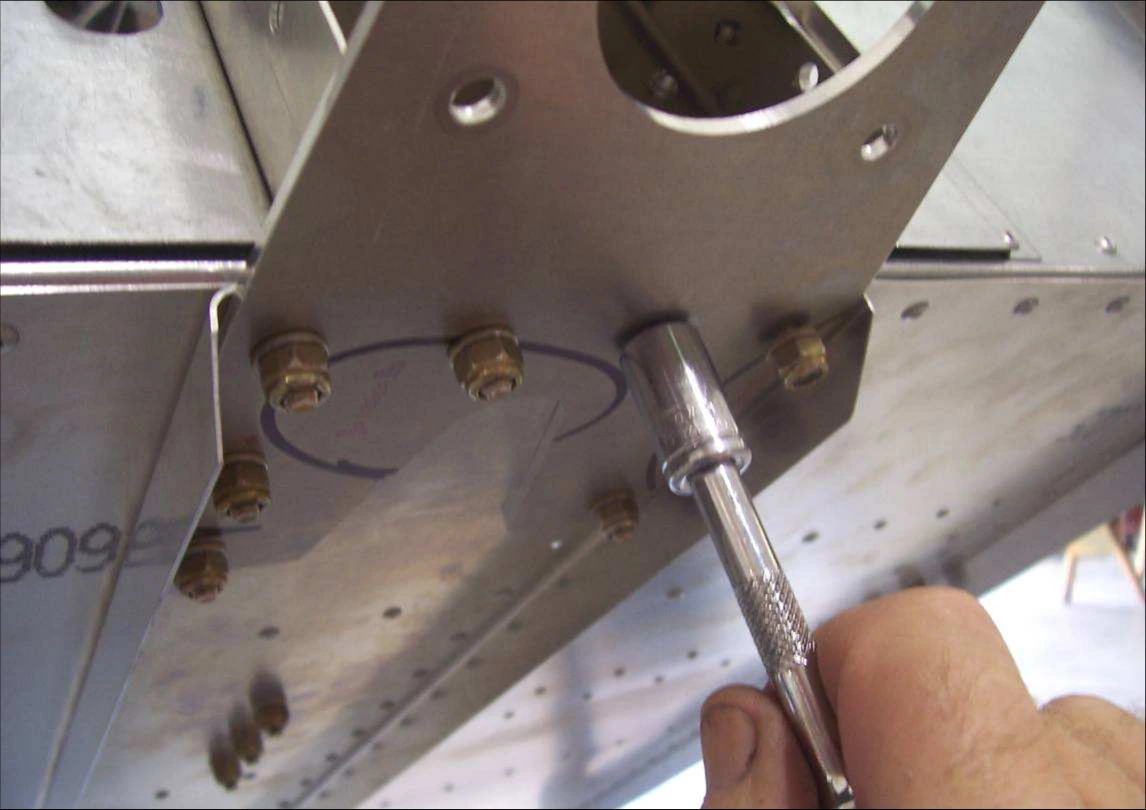
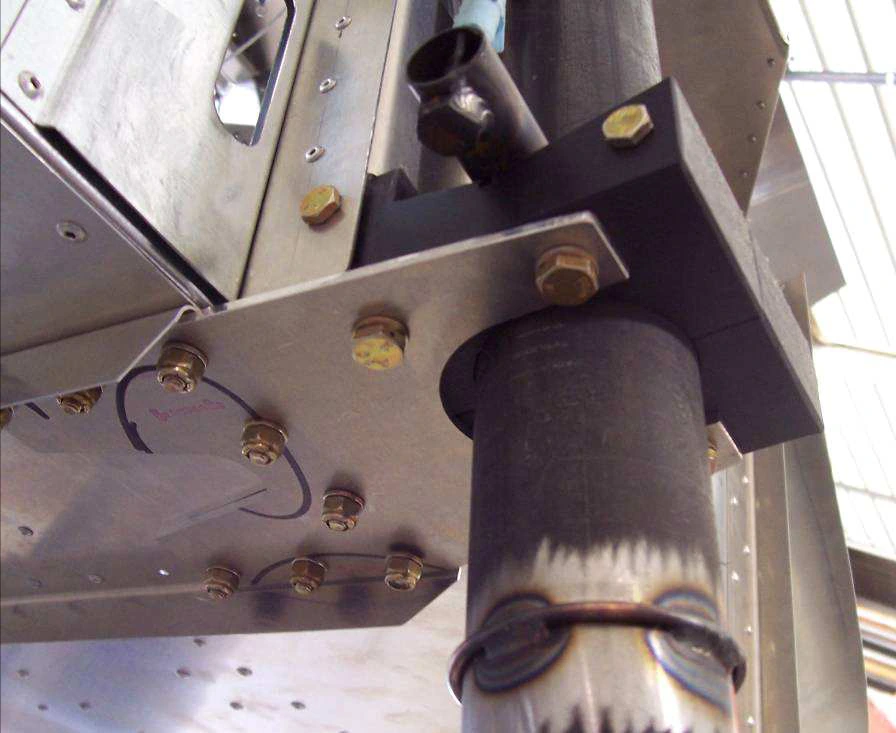
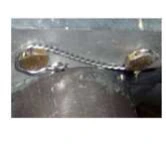
Соедините половины нижнего подшипника болтами между собой и с усилителем перегородки. Закрепите подшипник на нижней опоре и законтрите головки болтов проволокой поперёк пары, как показано на фотографии, чтобы исключить отворачивание.
Сверить с исходным текстом
CRUZER
Zenith Aircraft Company
Nose Gear
Section C75-LA-1, Page 9 of 9
Revision 1.0 (12/21/2015)
Use an AN3 bolt at the front of the Bearing to hold the drill guide in place. Set the bottom of the drill guide on
the Lower Bearing Support and overlap the outside of the Center Firewall Stiffener. With a #12 drill bit, back
drill through the drill guide into the Center Firewall Stiffener. Bolt the two halves of the Bottom Bearing
together and to the Center Firewall Stiffener.
Bolt the Bearing to the Lower Bearing Support and safety wire the heads of the bolts to prevent them from
backing out.
Safety wire across the bolts