CH 750 Cruzer · Каркас руля направления · Страница 1 из 12
Каркас руля направления Cruzer
Раздел C75-RA-1 включает часть A — каркас и часть B — обшивку руля. Детали поставляются с согласованными отверстиями окончательного размера.
Фотоинструкция дополняет чертежи и уступает им при расхождениях; технологические нормы и допуски сверяют с Construction Standards for Zenair Light Aircraft.
Сверить с исходным текстом
Cruzer
Zenith Aircraft Company
PART A: RUDDER SKELETON
Section C75-RA-1, Page 1 of 12
Revision 2.0 (03/23/17)
© 2013 Zenith Aircraft Co
PHOTO ASSEMBLY GUIDE — Section C75-RA-1
PART A: Rudder Skeleton
PART B: Rudder skin
This manual has been prepared for assembly of the Rudder supplied with finished hole size, match drilled
parts. This photo assembly manual is intended as a supplement to the drawings. If there is any
discrepancy between this manual and the drawings, the drawings supersede this manual. For information
on building standards and tolerances see “Construction Standards for Zenair Light Aircraft” available from
Zenith Aircraft Co.
CH 750 Cruzer · Каркас руля направления · Страница 2 из 12
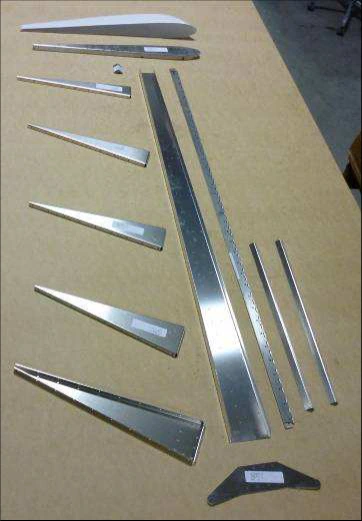
Детали и обозначения руля
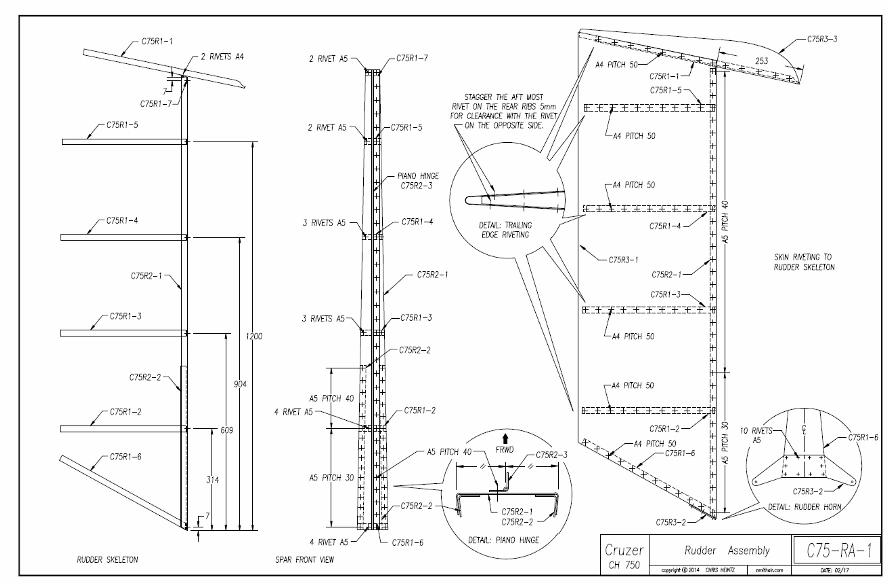
Пользуйтесь чертежом C75-RA-1 для толщин, размеров, ориентации, разметки, диаметров, расположения и шага заклёпок.
Пример C75R2-1 — лонжерон руля: C означает Cruzer, 75 — CH 750, R — раздел руля направления, 2 — лист этого раздела, 1 — деталь на листе. На деталях указаны номер и описание.
Сверить с исходным текстом
Cruzer
Zenith Aircraft Company
PART A: RUDDER SKELETON
Section C75-RA-1, Page 2 of 12
Revision 2.0 (03/23/17)
© 2013 Zenith Aircraft Co
In addition to the photo assembly guide, also refer to drawing C75-RA-1
(drawing number in right bottom corner of the title block). Always refer to the
drawings for technical information: material thickness, part dimension, part
orientation, layout distances, and rivet sizes, location and spacing.
Rudder parts
Zenith CH 750 Cruzer
Rudder Assembly
Parts are labeled for easy
identification with a part
number and description:
Part number example:
C75R2-1 Rudder
Spar
C — Cruzer
75 — CH 750 model.
R — Rudder section of the
aircraft drawings.
2 — Page 2 of the
Rudder drawings.
1 — Part 1 on page 2.
CH 750 Cruzer · Каркас руля направления · Страница 3 из 12
Кромки и усилители лонжерона
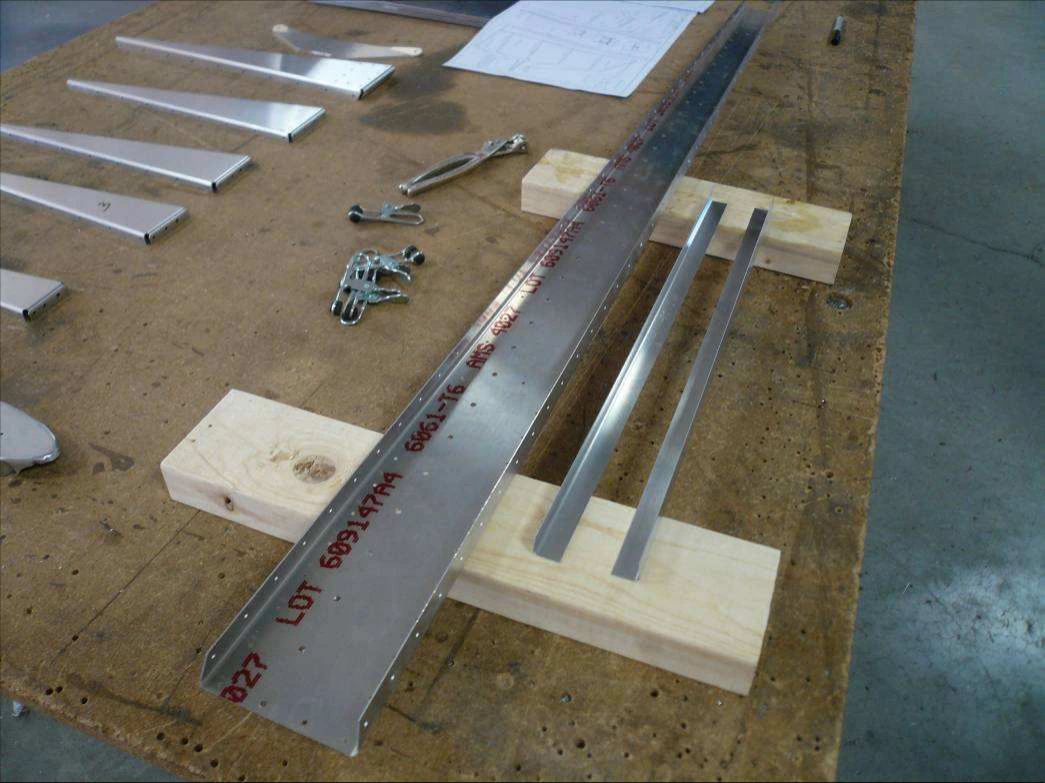
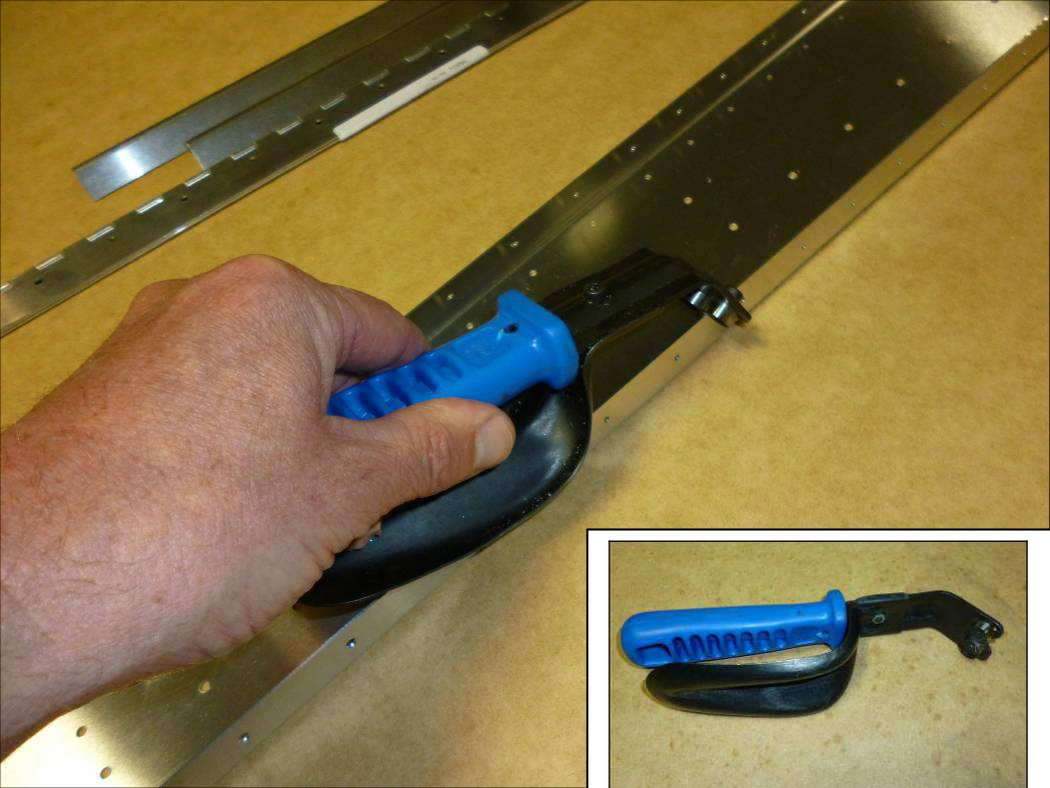
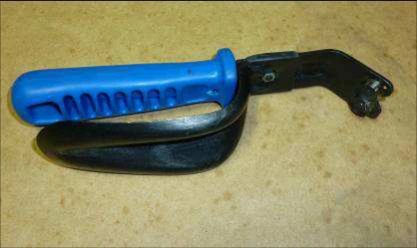
Уберите заусенцы напильником и слегка скруглите углы лонжерона C75R2-1. Для кромок показан инструмент 99-001-100. Стенка — плоская область между полками.
Для снятия наклеек источник предлагает растворитель для лака; применяйте совместимое с материалом средство по его инструкции.
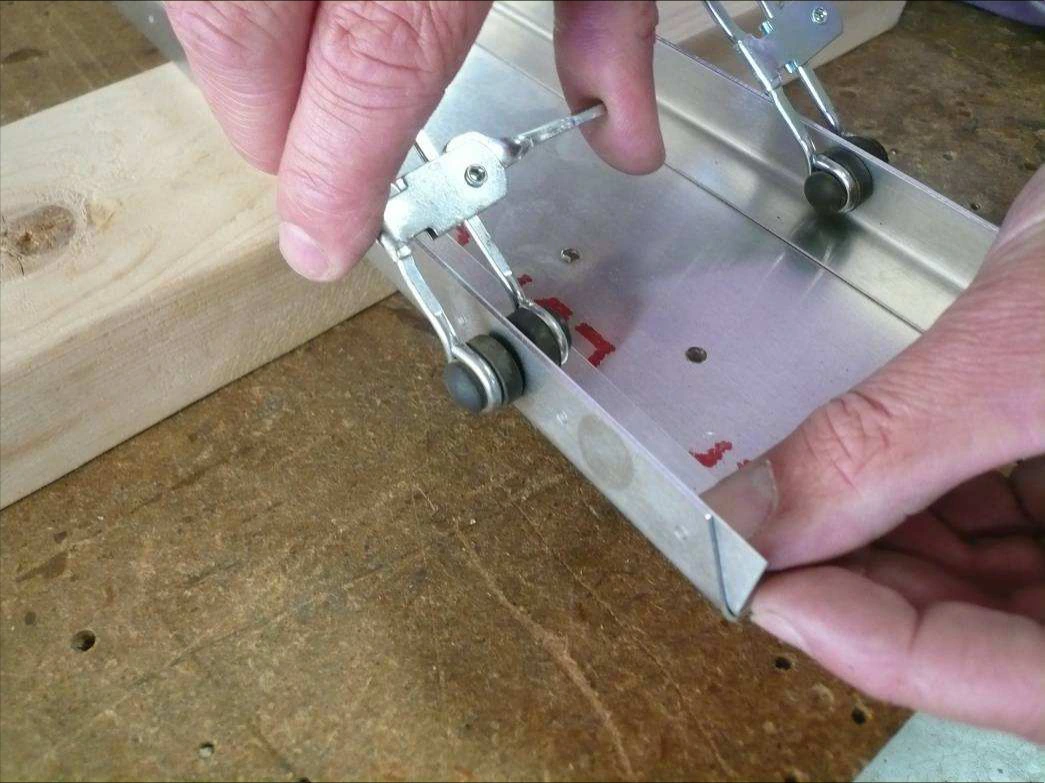
Вложите усилители C75R2-2 в лонжерон заподлицо с нижним торцом и зажмите каждый тремя зажимами. В примере Handi-Clamp TP640HC.
Сверить с исходным текстом
Cruzer
Zenith Aircraft Company
PART A: RUDDER SKELETON
Section C75-RA-1, Page 3 of 12
Revision 2.0 (03/23/17)
© 2013 Zenith Aircraft Co
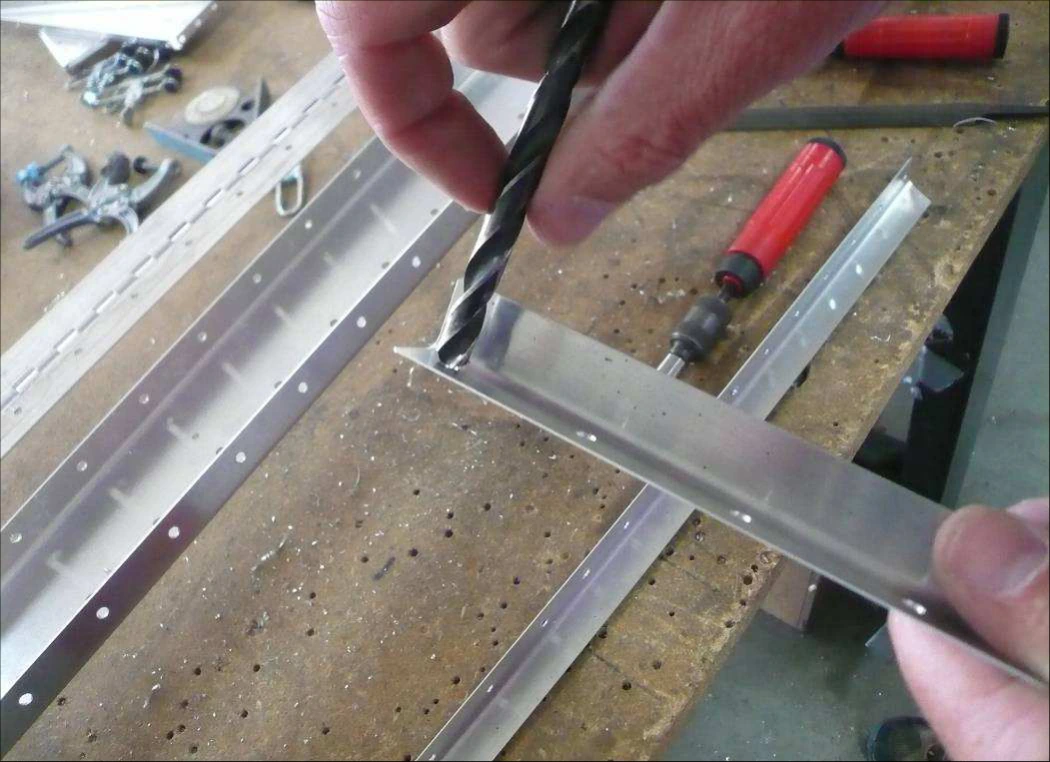
Use a file to remove any burs on the edges of the parts and lightly round off
corners. To remove the parts label it is best to use lacquer thinner. Also use
the edge burr too to deburr the edges.
P/N: C75R2-1
Rudder Spar
Spar Web — term used to
refer to the flat area
between the flanges.
Edge Deburring Tool
P/N: 99-001-100
Position the Spar Doublers inside the Spar, flush with the bottom of the Spar.
Clamp the Doublers to the Spar using three clamps on each Doubler.
P/N: C75R2-2
Rudder Doubler
P/N: TP640HC
Handi-Clamp
CH 750 Cruzer · Каркас руля направления · Страница 4 из 12
Сверление стенки с усилителями
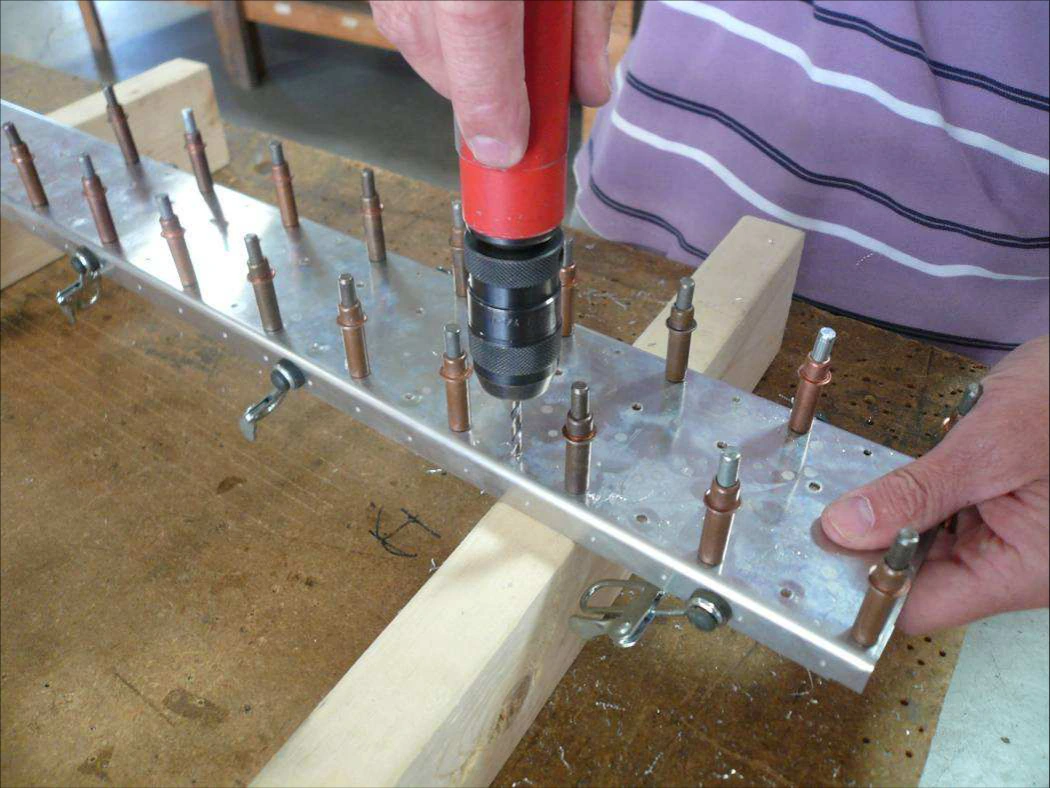
Переверните лонжерон C75R2-1. Через его начальные отверстия сверлите усилители C75R2-2 #30 и ставьте Cleco через одно отверстие.
Увеличьте свободные отверстия #20 и поставьте соответствующие Cleco. Затем снимите фиксаторы #30 и увеличьте оставшиеся отверстия #20.
Сверить с исходным текстом
Cruzer
Zenith Aircraft Company
PART A: RUDDER SKELETON
Section C75-RA-1, Page 4 of 12
Revision 2.0 (03/23/17)
© 2013 Zenith Aircraft Co
Flip the Spar over and back drill through the pilot holes for the Doublers with
a #30 drill bit and cleco every other hole.
P/N: C75R2-1
Rudder Spar
P/N: C75R2-2
Rudder Doubler
Switch to a #20 drill bit and expand the holes for the Doublers and cleco.
Remove the #30 clecos and expand those holes with a #20 drill bit.
P/N: C75R2-1
Rudder Spar
P/N: C75R2-2
Rudder Doubler
CH 750 Cruzer · Каркас руля направления · Страница 5 из 12
Боковые полки и линия подрезки
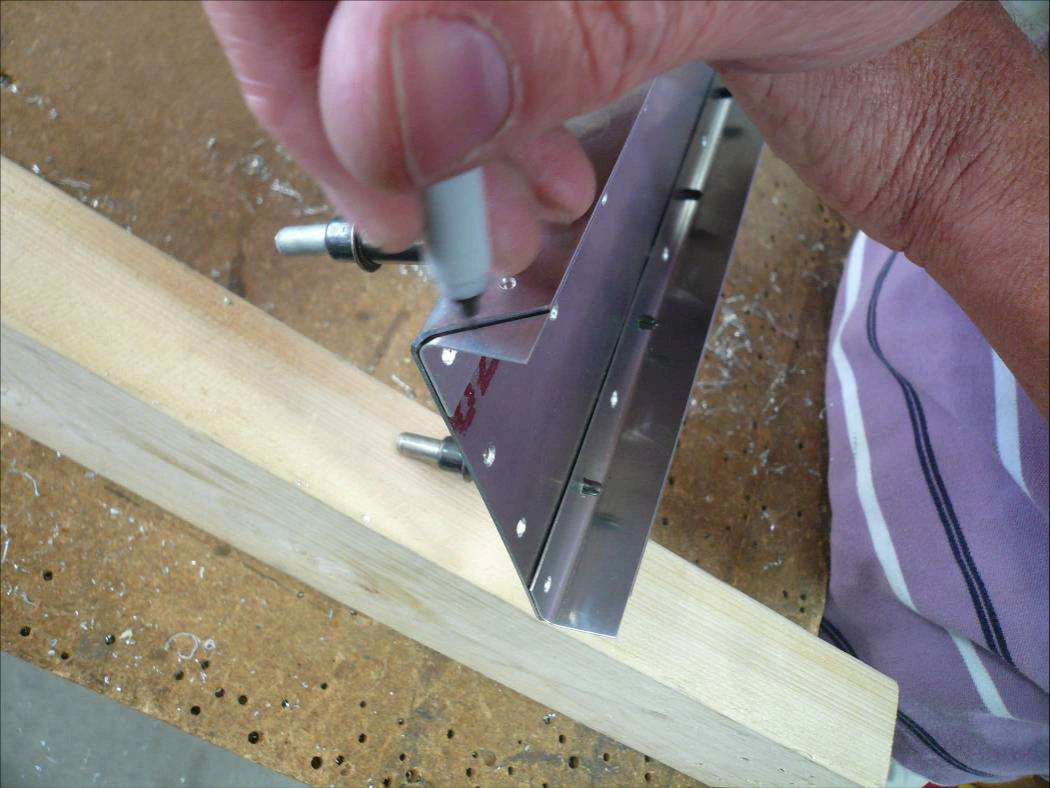
Перенесите нижний торец лонжерона C75R2-1 на полки усилителей C75R2-2: по этой линии они подрезаются позже.
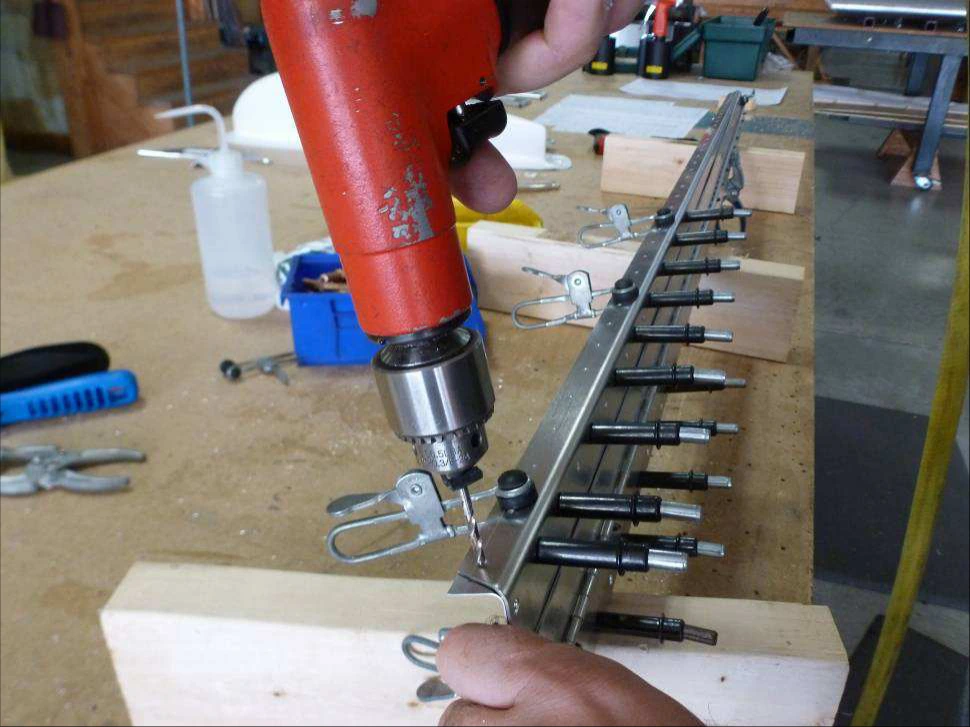
Через боковые отверстия лонжерона сверлите усилители #30 и ставьте Cleco, затем увеличьте #20 до совпадения с отверстиями выше усилителей.
Сверить с исходным текстом
Cruzer
Zenith Aircraft Company
PART A: RUDDER SKELETON
Section C75-RA-1, Page 5 of 12
Revision 2.0 (03/23/17)
© 2013 Zenith Aircraft Co
Mark the end of the Spar on the flange of the Doublers. The Doublers will be
trimmed along this line later.
P/N: C75R2-1
Rudder Spar
P/N: C75R2-2
Rudder Doubler
Use a #30 drill bit to back drill through the Spar into the Doublers on the side
flange and cleco. Then expand the holes with a #20 drill bit to match the
holes in the Spar above the Doublers.
P/N: C75R2-1
Rudder Spar
P/N: C75R2-2
Rudder Doubler
CH 750 Cruzer · Каркас руля направления · Страница 6 из 12
Подрезка и удаление заусенцев
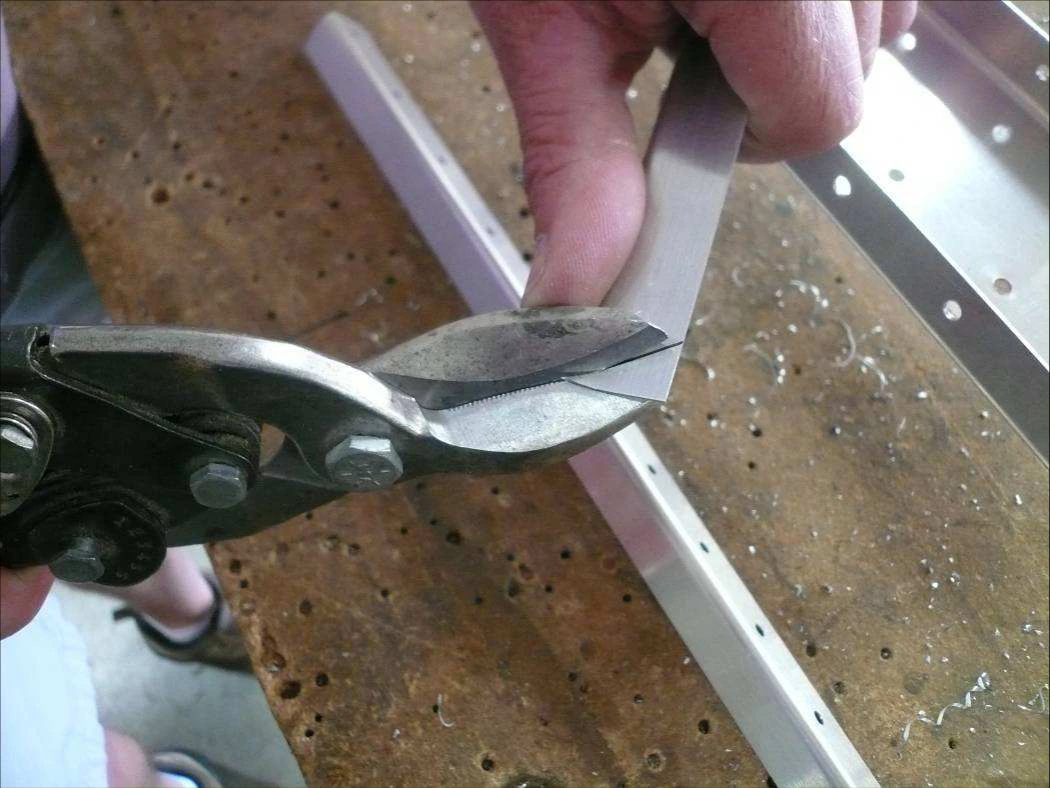
Снимите усилители C75R2-2, подрежьте ножницами по линии. Не смыкайте ножницы полностью на сохраняемом материале, чтобы не оставить залом. Доведите срез напильником.
Большим сверлом лёгкими короткими поворотами уберите заусенцы отверстий всех деталей руля, включая нервюры.
Важно: это удаление заусенцев, а НЕ зенкование отверстий.
Сверить с исходным текстом
Cruzer
Zenith Aircraft Company
PART A: RUDDER SKELETON
Section C75-RA-1, Page 6 of 12
Revision 2.0 (03/23/17)
© 2013 Zenith Aircraft Co
Remove the Doublers from the Spar. Use a pair of Snips to trim the Doublers
along the line. Be careful to not fully close the snips when making a cut, doing
so will kink the material. Use a file to smooth the cut edge.
P/N: C75R2-2
Rudder Doubler
Use a large drill bit to deburr the holes in all the Rudder parts, including the
ribs. A couple quick turns with light pressure will remove the burrs. Be careful
not to countersink the holes!
P/N: C75R2-2
Rudder Doubler
CH 750 Cruzer · Каркас руля направления · Страница 7 из 12
Возврат усилителей и нижняя нервюра
Верните левый и правый усилители C75R2-2 в лонжерон на Cleco.
Нижняя нервюра C75R1-6 располагается сверху усилителей и лонжерона; её боковые полки входят внутрь усилителей.
Сверить с исходным текстом
Cruzer
Zenith Aircraft Company
PART A: RUDDER SKELETON
Section C75-RA-1, Page 7 of 12
Revision 2.0 (03/23/17)
© 2013 Zenith Aircraft Co
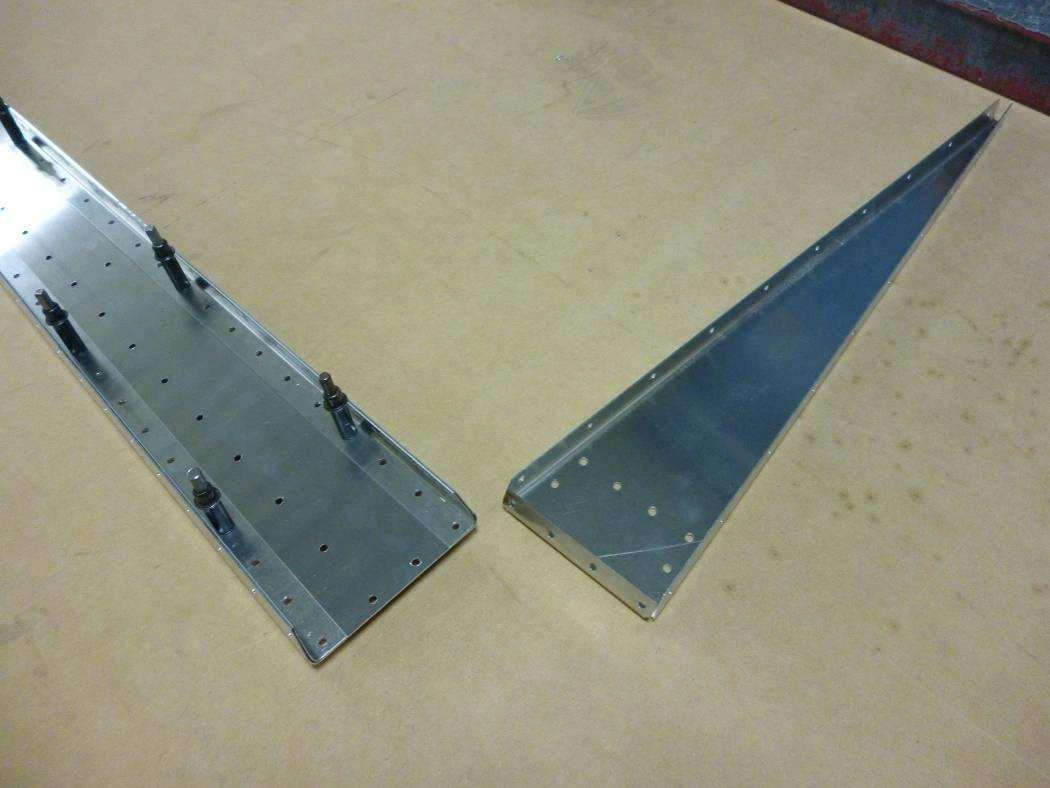
Cleco the left and right doublers back in the spar.
P/N: C75R2-2
Rudder Doubler
The bottom rib is positioned on top of the doublers and spar. The side flanges
fit on the inside of the doublers.
P/N: C75R1-6
Bottom Rudder Rib
CH 750 Cruzer · Каркас руля направления · Страница 8 из 12
Нижняя и первая нервюры
Соедините нижнюю нервюру C75R1-6 с лонжероном на Cleco.
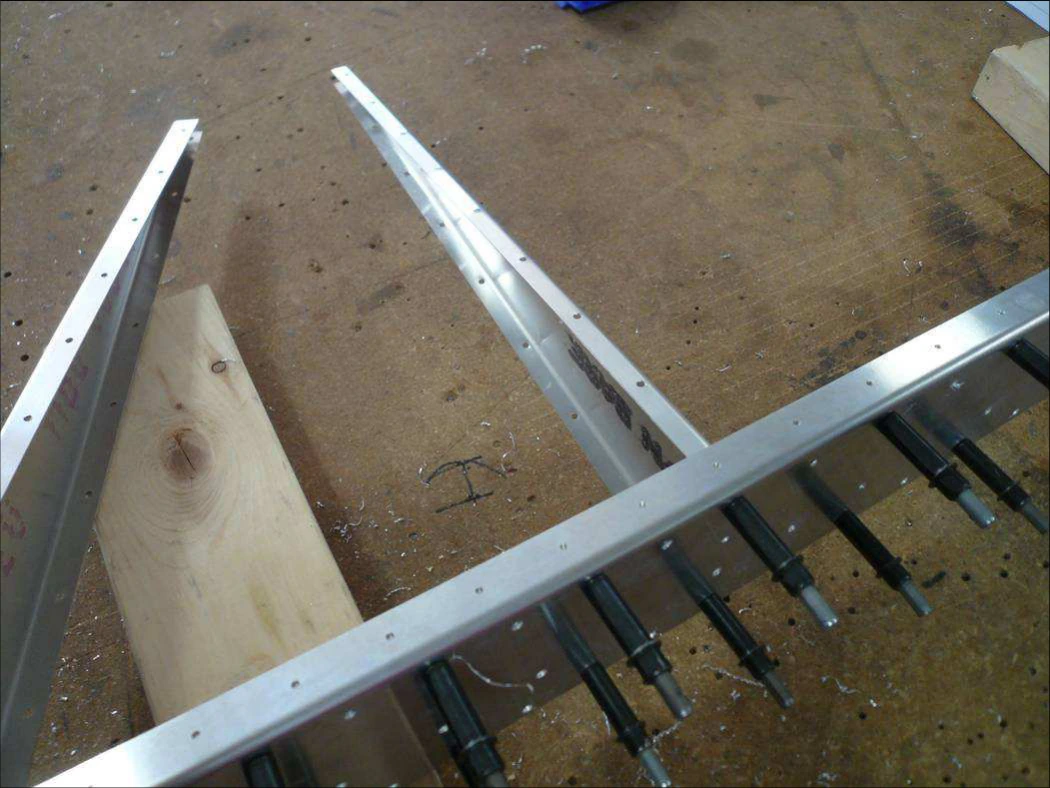
Заведите нервюру №1 C75R1-2 снизу между полками лонжерона. Её отверстия находятся в 314mm от нижнего торца; поставьте Cleco.
Сверить с исходным текстом
Cruzer
Zenith Aircraft Company
PART A: RUDDER SKELETON
Section C75-RA-1, Page 8 of 12
Revision 2.0 (03/23/17)
© 2013 Zenith Aircraft Co
Cleco the bottom rib to the spar.
P/N: C75R1-6
Bottom Rudder Rib
Slide Rib #1 between the flanges of the Spar up from the bottom. Cleco Rib
#1 to the holes in the Spar 314mm up from the bottom of the Spar.
P/N: C75R1-2
Rudder Rib #1
CH 750 Cruzer · Каркас руля направления · Страница 9 из 12
Вторая и третья нервюры
Нервюру №2 C75R1-3 заведите между полками и закрепите на станции 609mm от низа лонжерона.
Аналогично нервюру №3 C75R1-4 поставьте на 904mm от низа.
Сверить с исходным текстом
Cruzer
Zenith Aircraft Company
PART A: RUDDER SKELETON
Section C75-RA-1, Page 9 of 12
Revision 2.0 (03/23/17)
© 2013 Zenith Aircraft Co
Slide Rib #2 into position between the flanges of the Spar. Cleco Rib #2 to
the holes in the Spar 609mm from the bottom of the Spar.
P/N: C75R1-3
Rudder Rib #2
Slide Rib #3 into position between the flanges of the Spar. Cleco Rib #3 to
the holes in the Spar 904mm from the bottom of the Spar.
P/N: C75R1-4
Rudder Rib #3
CH 750 Cruzer · Каркас руля направления · Страница 10 из 12
Четвёртая нервюра и верхний уголок
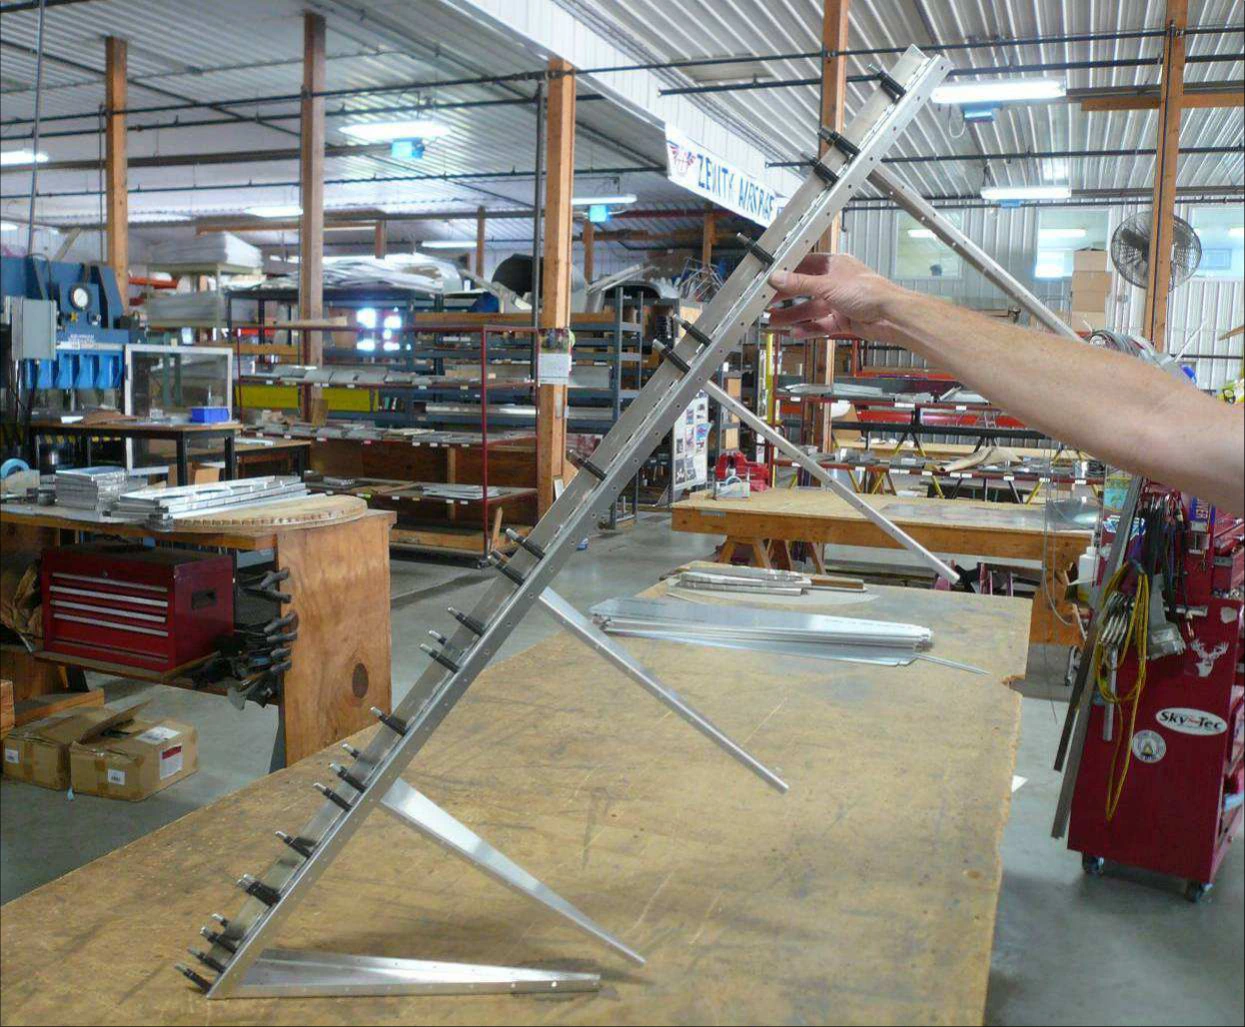
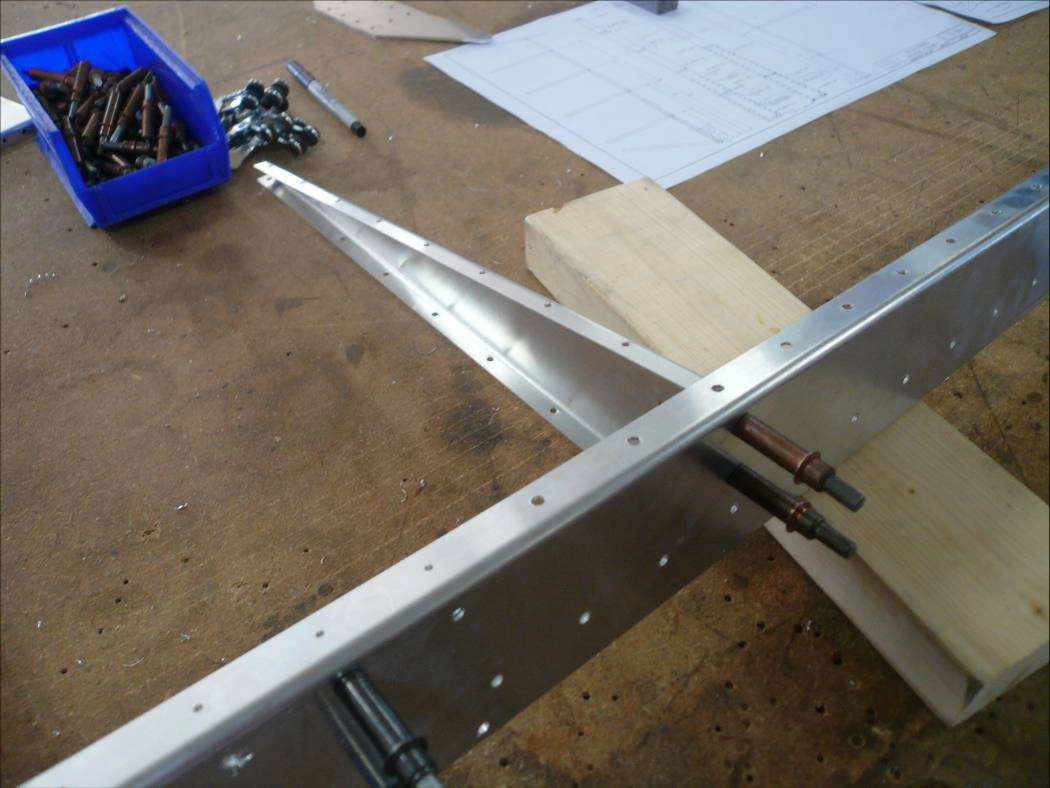
Нервюру №4 C75R1-5 поставьте между полками на 1200mm от низа и закрепите Cleco.
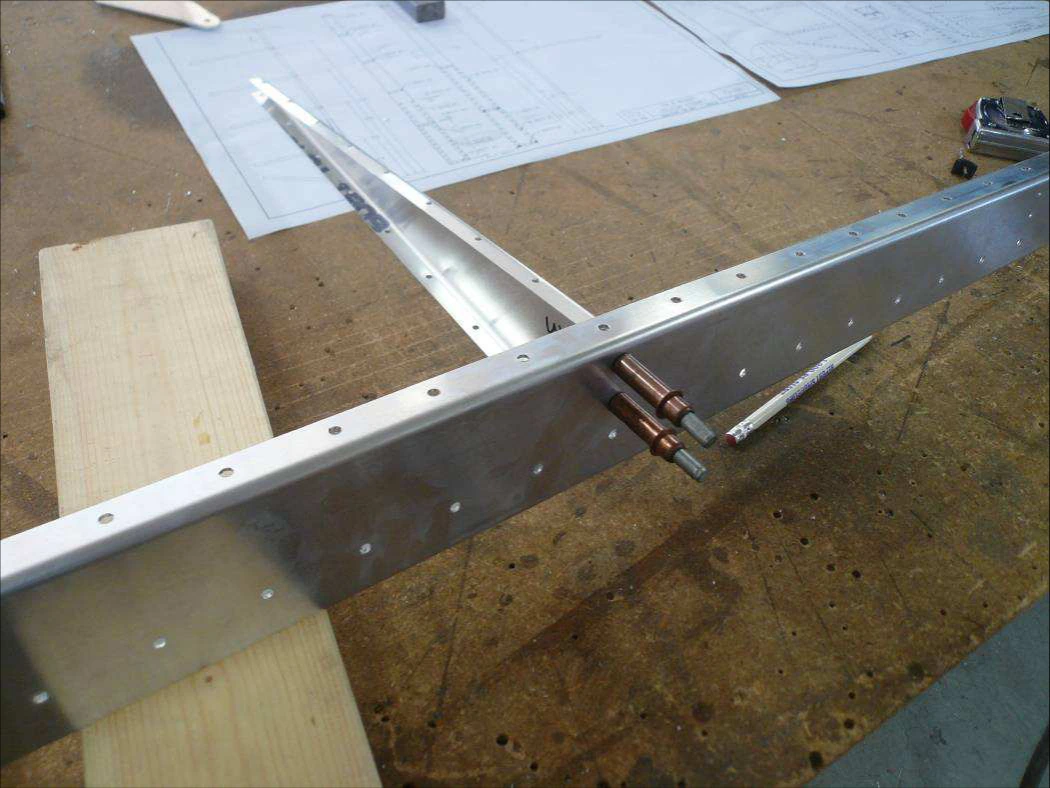
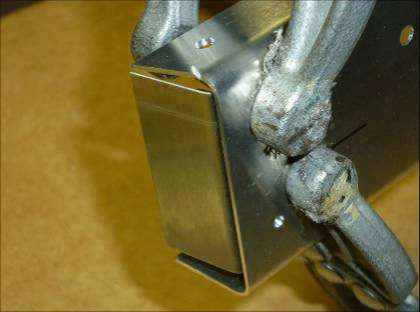
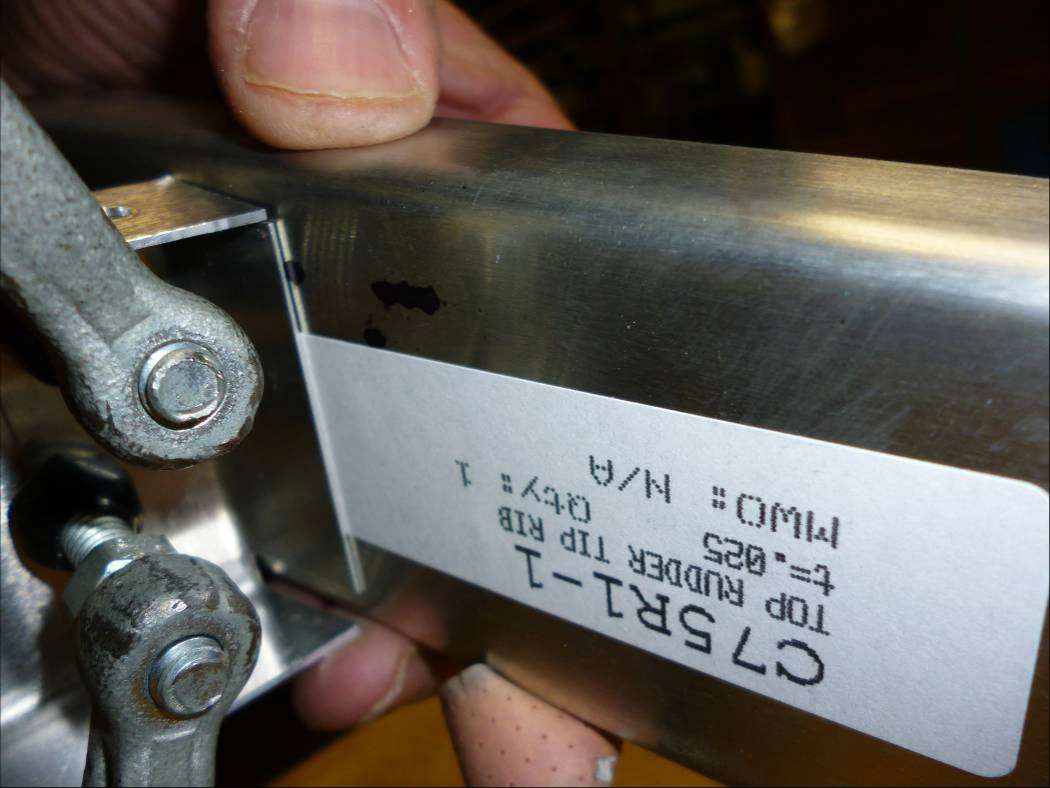
Верхним концевым ребром выставьте полку уголка C75R1-7 заподлицо с верхом лонжерона. Прижмите уголок к лонжерону.
Сверить с исходным текстом
Cruzer
Zenith Aircraft Company
PART A: RUDDER SKELETON
Section C75-RA-1, Page 10 of 12
Revision 2.0 (03/23/17)
© 2013 Zenith Aircraft Co
Slide Rib #4 into position between the flanges of the Spar. Cleco Rib #4 to
the holes in the Spar 1200mm from the bottom of the Spar.
P/N: C75R1-5
Rudder Rib #4
P/N: C75R1-7
Rudder Tip Angle
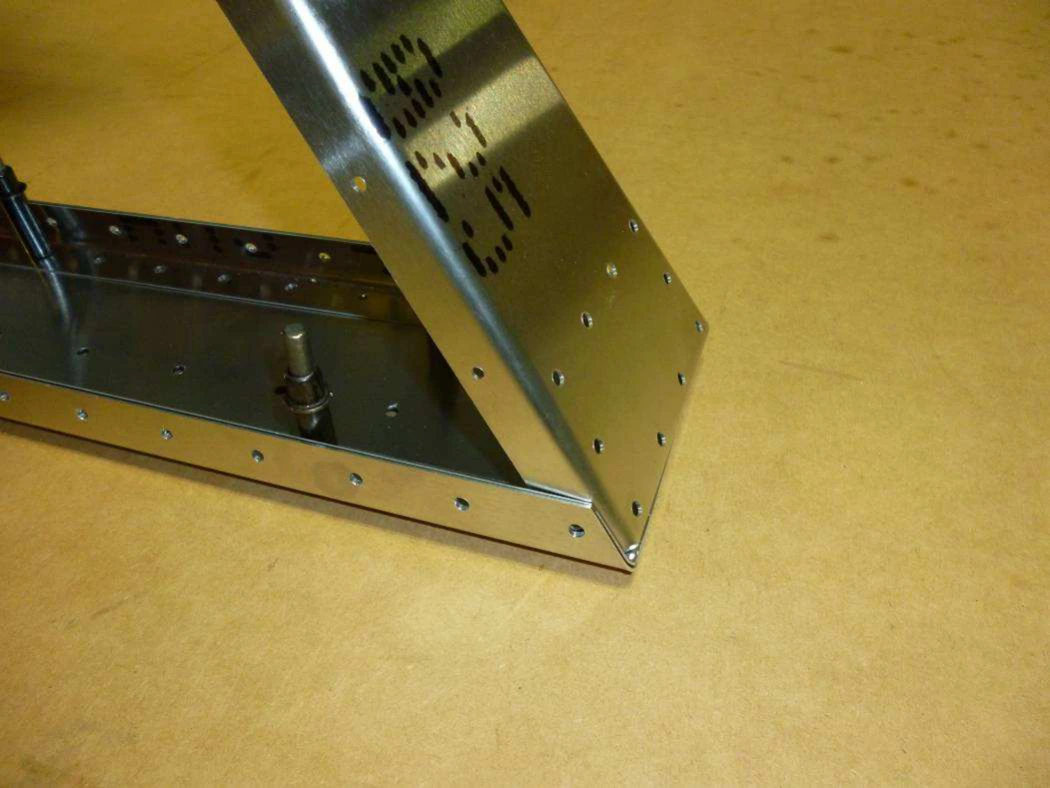
Use the tip rib to set the top flange of the angle flush with the top of the spar.
Clamp the angle to the spar.
CH 750 Cruzer · Каркас руля направления · Страница 11 из 12
Клёпка каркаса
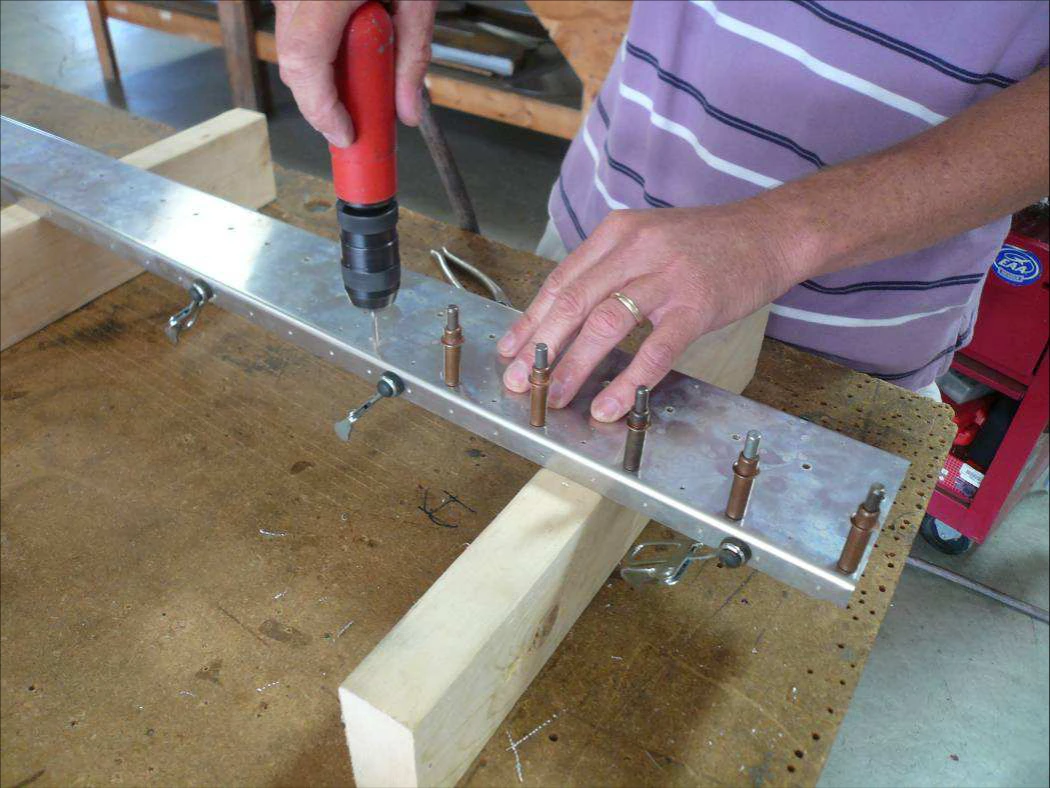
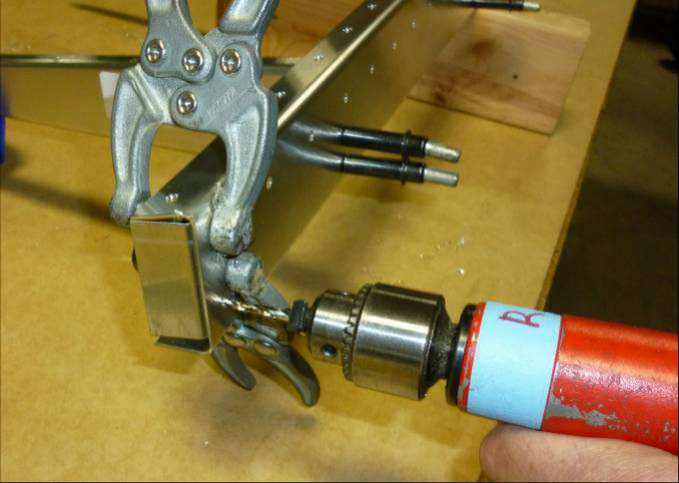
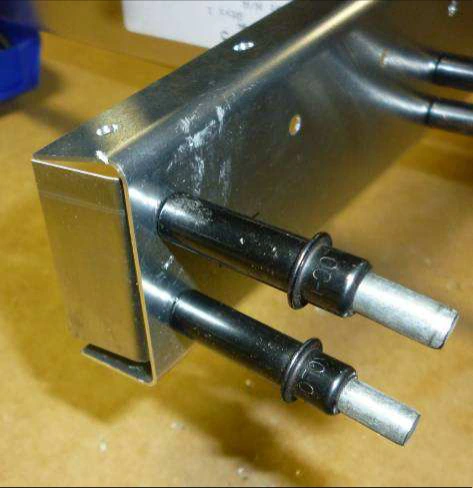
Совместите сверло с отверстием лонжерона и просверлите уголок.
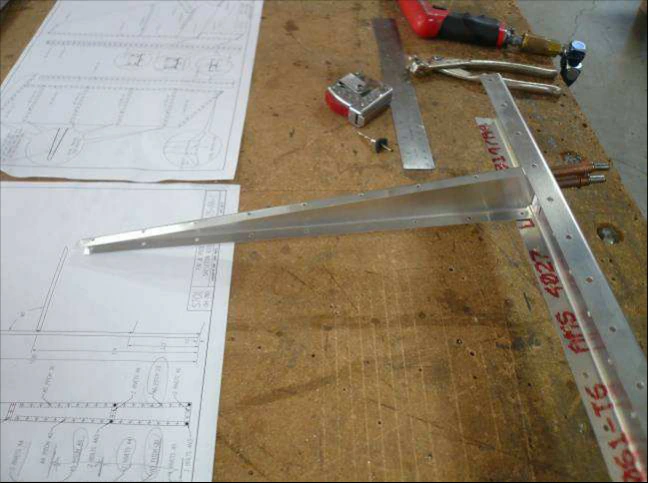
Склепайте каркас, располагая головки на стенке лонжерона. Используйте соответствующую насадку под A5.
Важно: ряд рояльной петли пока не клепайте. Полки лонжерона клепаются вместе с обшивкой в следующем разделе.
Сверить с исходным текстом
Cruzer
Zenith Aircraft Company
PART A: RUDDER SKELETON
Section C75-RA-1, Page 11 of 12
Revision 2.0 (03/23/17)
© 2013 Zenith Aircraft Co
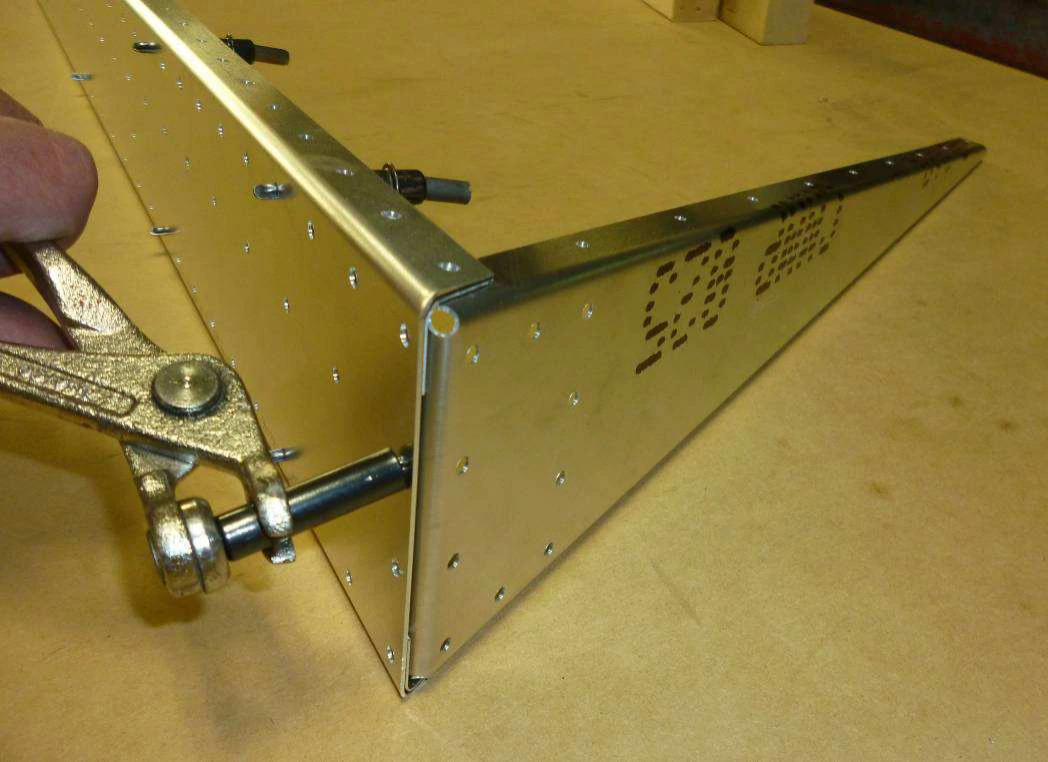
Line up the drill through the hole in the spar and drill through the angle.
Rivet the Skeleton together: set the rivet head on the web of the Spar. Do not rivet the holes on the rivet
line for the piano hinge. Make sure you have the proper riveter head for the A5 rivets
NOTE: The spar flanges get riveted with the Skin in the next section.
CH 750 Cruzer · Каркас руля направления · Страница 12 из 12
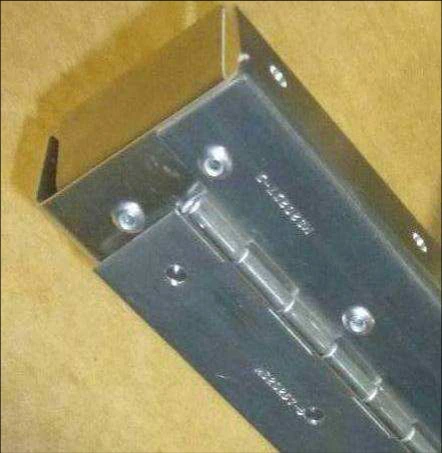
Рояльная петля руля
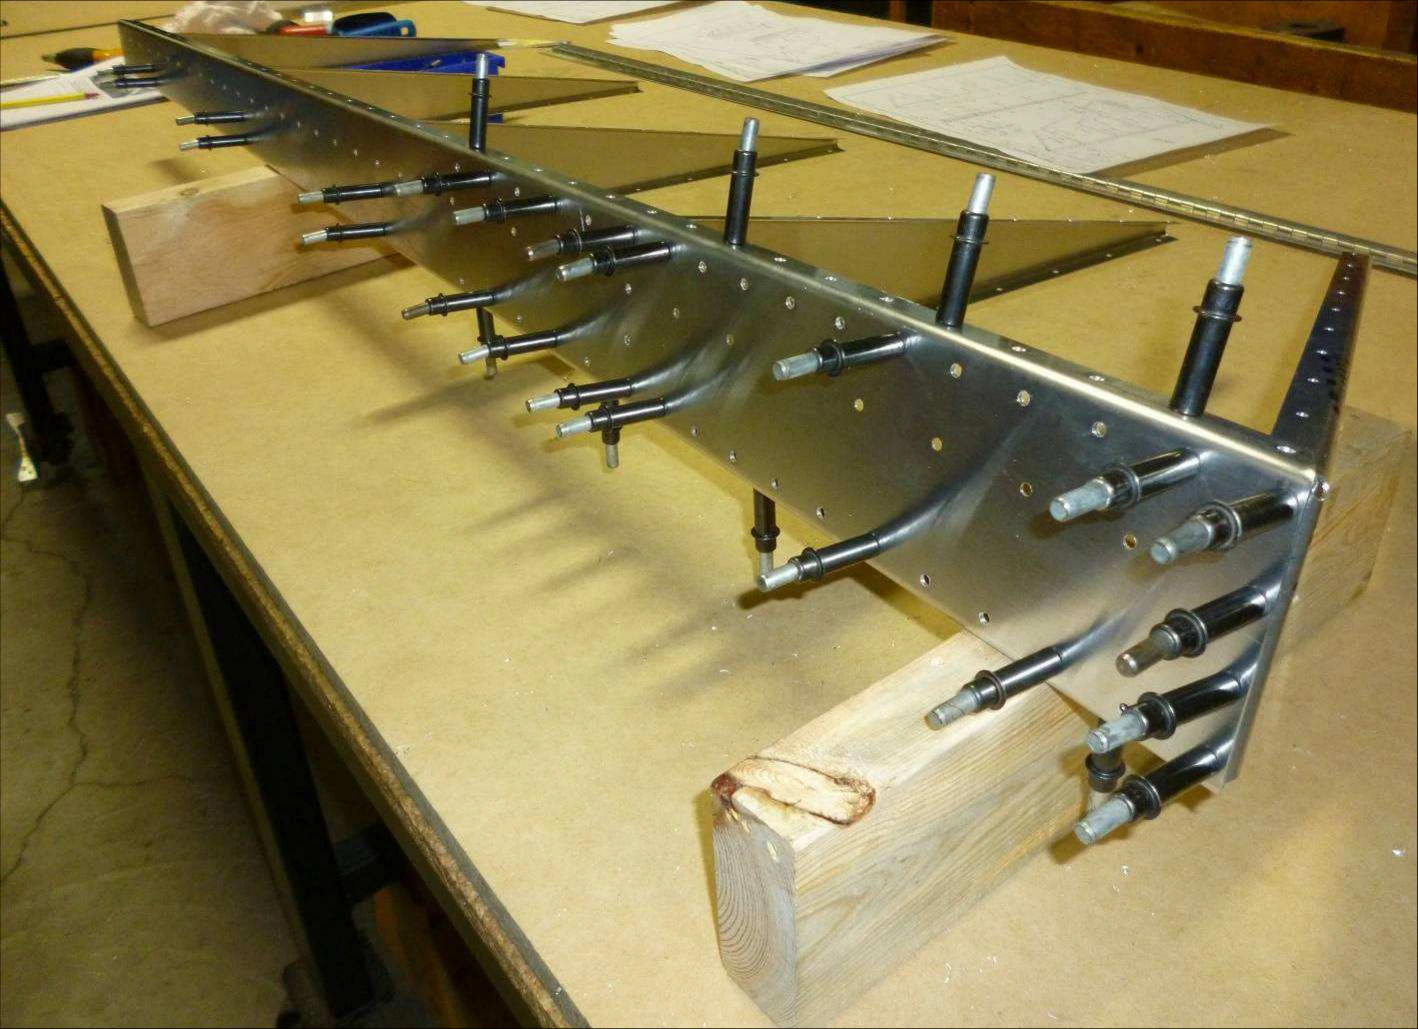
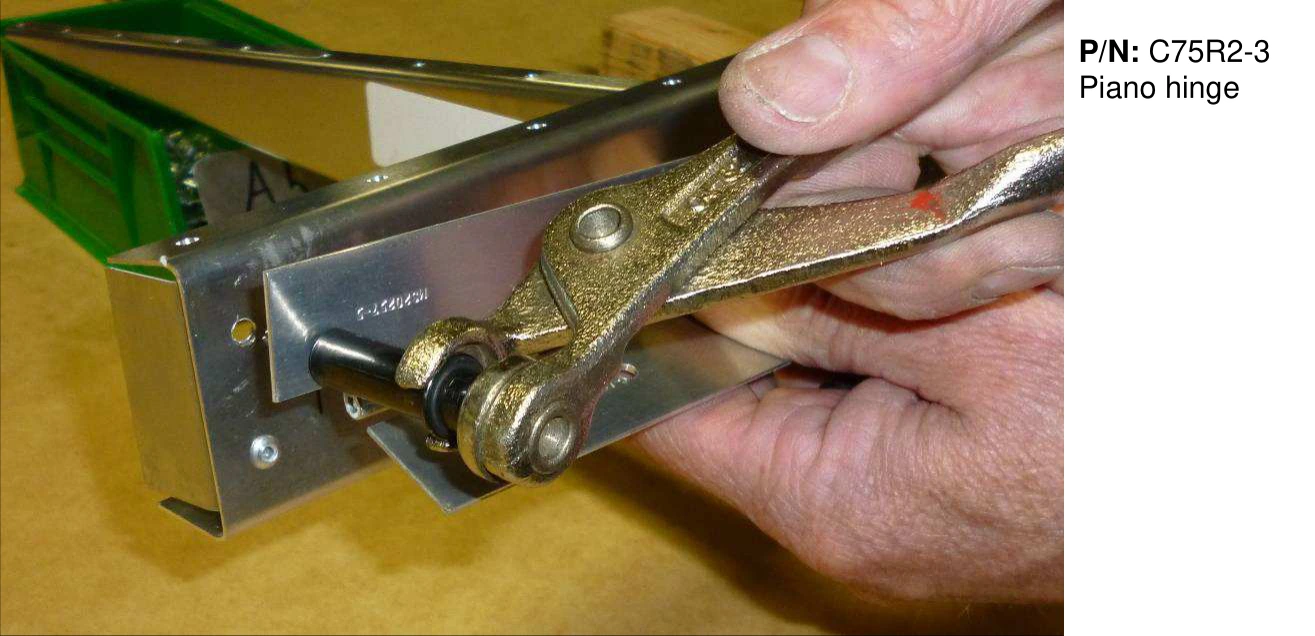
Определите верх петли C75R2-3 и поставьте её на лонжерон с Cleco.
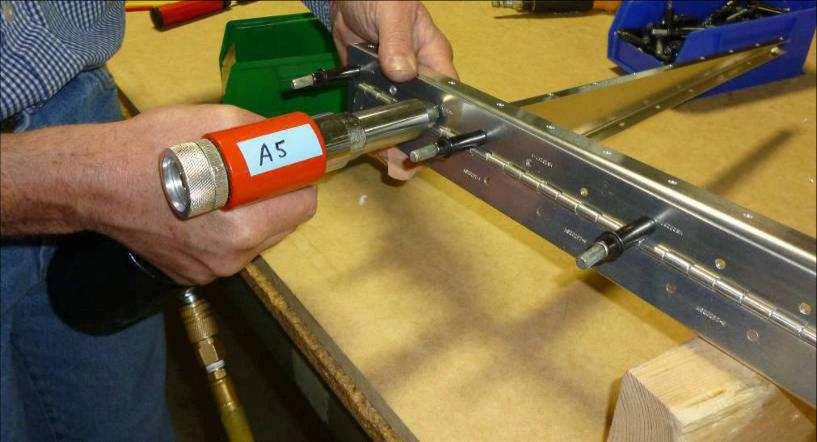
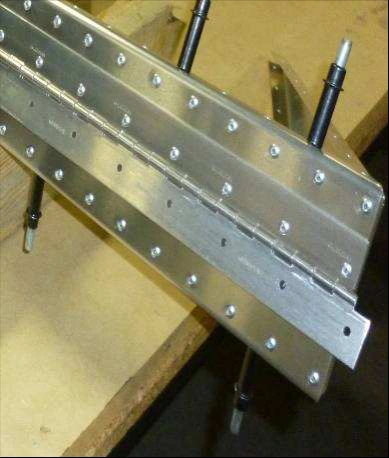
Приклепайте петлю A5 по показанному ряду. На фотографиях отмечены её верх и низ.
Сверить с исходным текстом
Cruzer
Zenith Aircraft Company
PART A: RUDDER SKELETON
Section C75-RA-1, Page 12 of 12
Revision 2.0 (03/23/17)
© 2013 Zenith Aircraft Co
Identify the top of the hinge and cleco it to the spar.
P/N: C75R2-3
Piano hinge
Hinge: Top. Rivet with A5 rivets.
Hinge: Bottom.